
Pull-through braids show up everywhere right now. On runways, reels and women who want a unique hairstyle that looks super-elegant without taking an hour to do. The name sounds technical but the actual process is straightforward once you see it broken down. No three-strand crossing, no feed-in technique, no advanced hand coordination required.
This week on HairstyleCamp Originals, we’re showing you a version that takes that simplicity and pushes it into full statement territory: a pull-through braid styled as a softened braided crown that sits high on the head, frames the face from every angle and holds its shape all day without a single bobby pin.
Tutorial
Pull-Through Braid
 Front
Front
 Back
Back
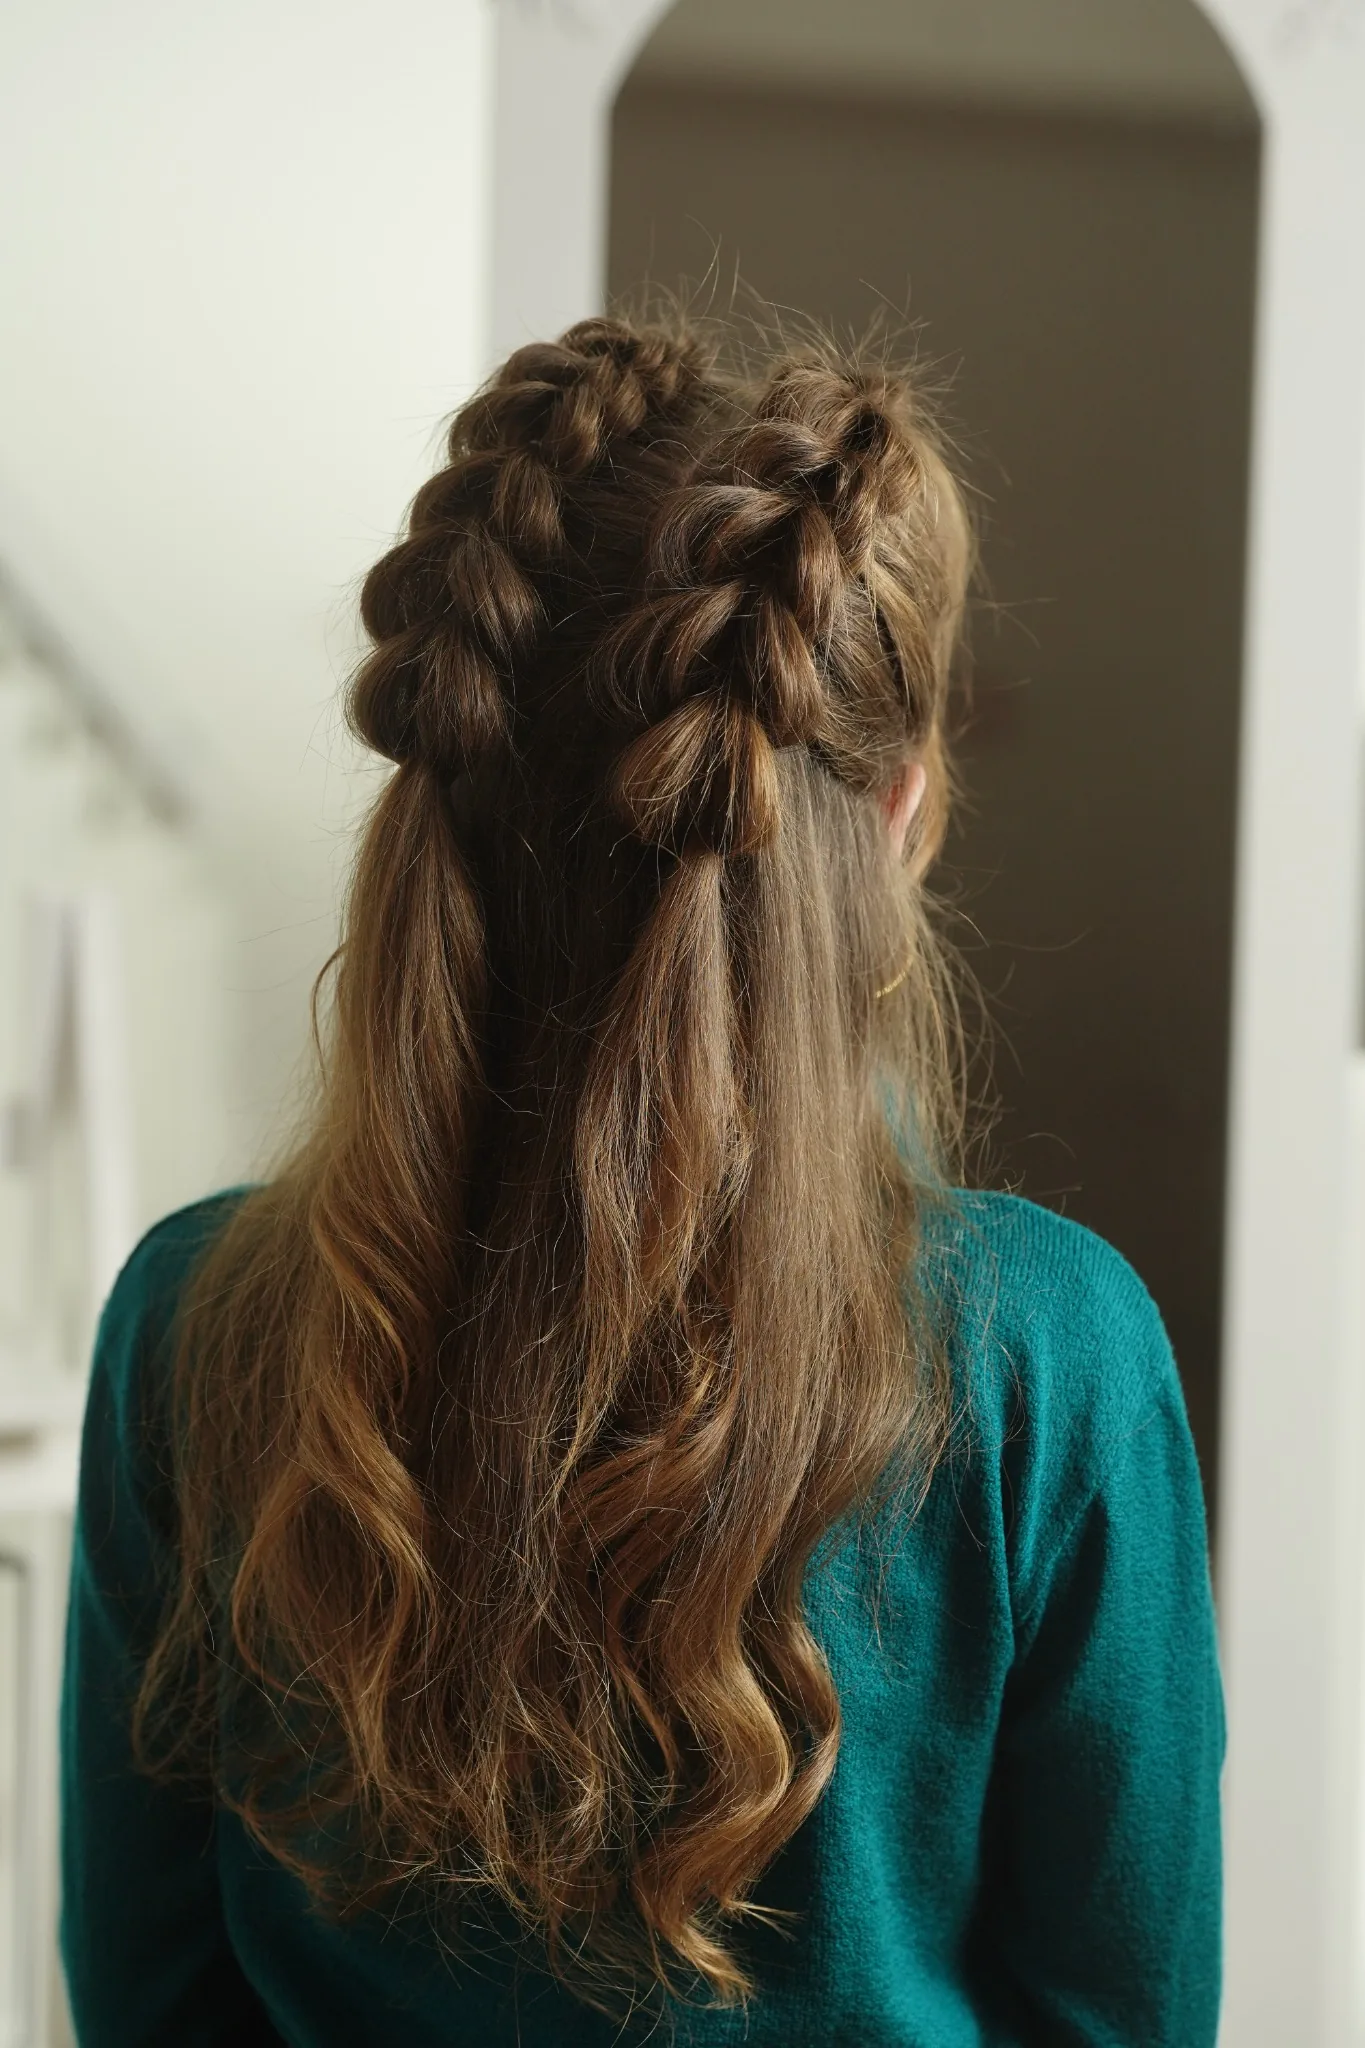
From the back, this hairstyle gives the impression of a softened braided crown. Look closer and the construction tells a different story: tiny elastics, linked ponytails and a repeated pull-through sequence that creates shape without a traditional three-strand braid. That contrast is what makes it so striking. The finish looks elegant without making the method hard to follow.
This hairstyle is created one side at a time, then mirrored on the other for balance. Precision matters. Keep the ponytails small, keep the elastics close together and clip the lifted center ponytail out of the way before tying the next section.
While keeping track of precise sections and tiny elastics might sound a bit intimidating at first, don’t let the mechanics overwhelm you. My biggest piece of advice for mastering this look is simple:
Tools and Prep
To create this elegant hairstyle, you just need a few basic tools to keep your hair neat and easy to manage: Gather your everyday hair brush, a tail comb for clean parting, some clear elastics, a hair clip to manage your sections and hairspray.
Before You Begin
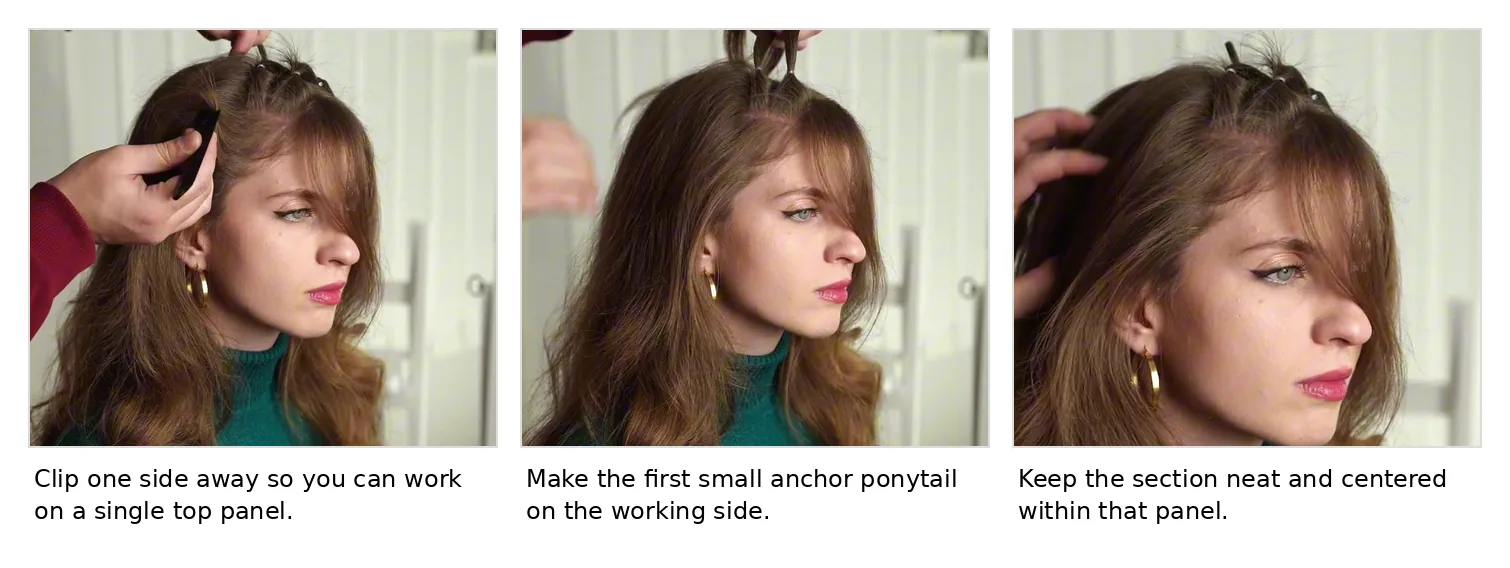
Brush the hair through until the top section feels smooth and easy to control. Leave out any fringe or soft face-framing pieces before you start. Then divide only the top section into two even working panels and clip one side away completely.
Keep the sections compact. Keep the elastics close. This style holds its shape best when the placement stays neat and the pattern builds tightly through the crown.
How to Do Double Pull-Through Braids
With your hair detangled, perfectly sectioned and your elastics within reach, it’s time to start braiding!
Section the top and create the first anchor ponytail
On the side you are working on first, take a small section near the front of the top panel and secure it with an elastic. This first ponytail sets the line for the braid, so keep it centered within the panel and sized similarly to what you want the later links to be.
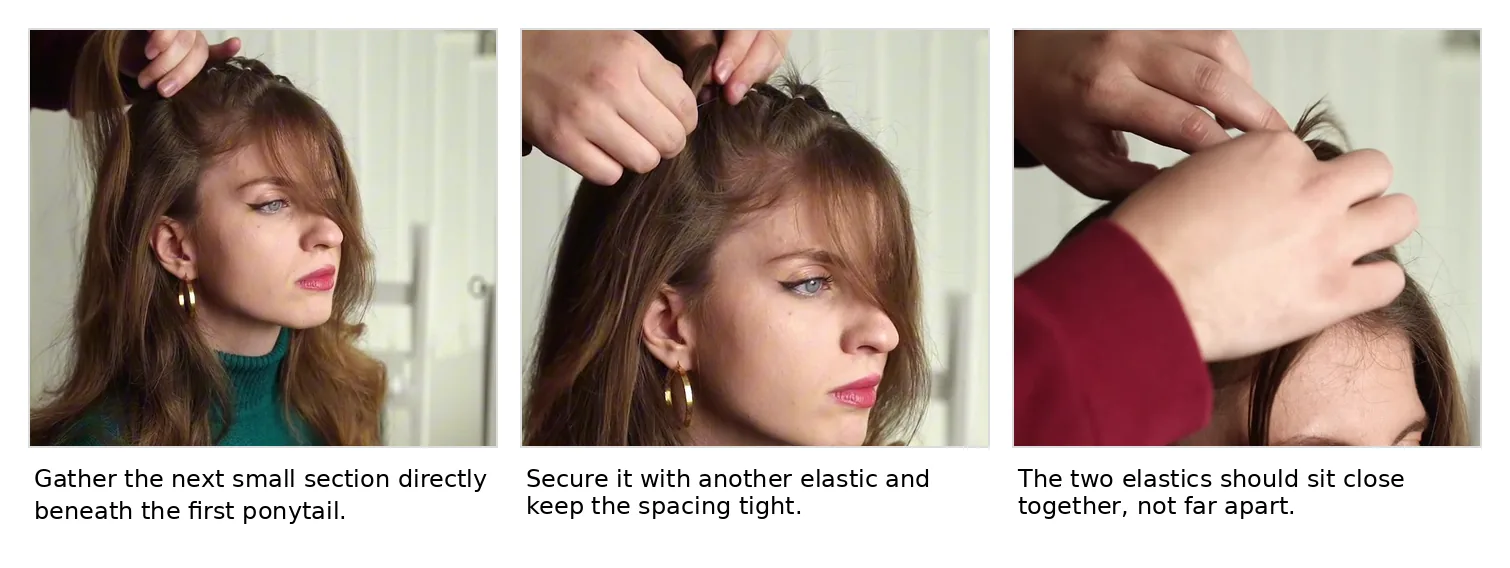
Stack the second ponytail directly beneath the first
Take the next small section directly under the first elastic and secure it with another elastic. Keep this second ponytail very close to the first one – almost stacked rather than dropped low. Use the hair immediately below the first ponytail and only a very small amount from the edges of that panel if needed, so the section stays narrow and controlled.
Split the top ponytail and lift the lower ponytail through the middle
Now take the upper ponytail and divide it into two equal halves – one to the left and one to the right. With that split open, lift the lower ponytail straight up through the center. Do not poke a hole at the scalp. The opening comes from splitting the upper ponytail itself. Once the lower ponytail is lifted through, clip it up at the crown so your hands are free for the next elastic.
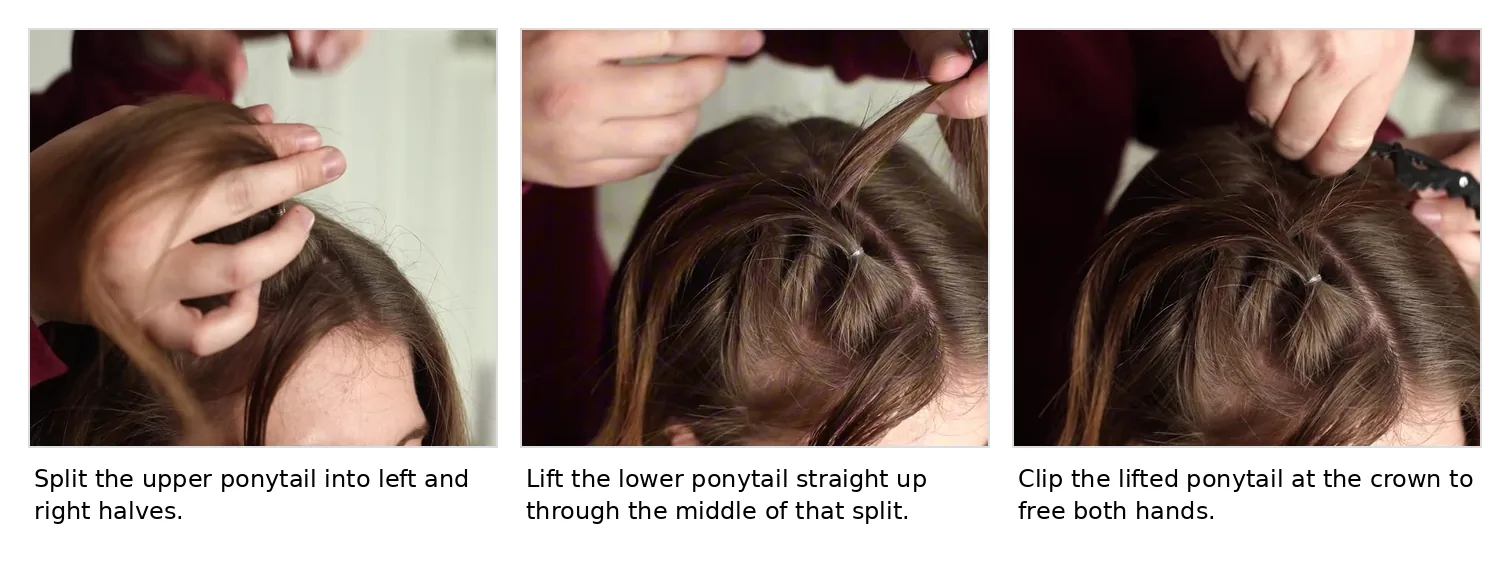
Bring the dropped halves down, add hair and tie the first link
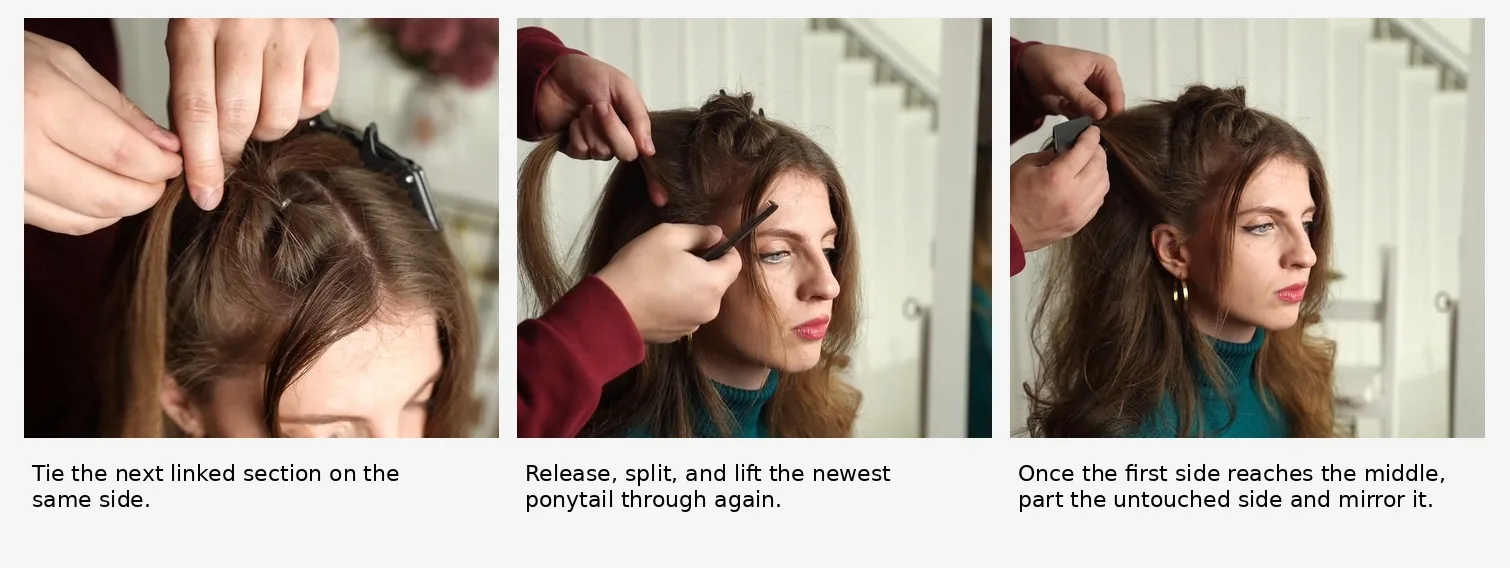
Let the two split halves fall back down beneath the clipped center ponytail. Then add a small piece of loose hair from each side of the working panel and join everything together with a new elastic. This is the step that forms the braid’s first real link.
As soon as the new elastic is in place, immediately use your fingers to gently pinch and tug the outer edges of this newly formed loop to widen and soften it. You must loosen as you go; if you wait until the entire side is finished, the elastics will be too tight to move, and it will be much harder to control the braid’s rounded, romantic shape!

Repeat the pattern
From here, the rhythm stays the same.
Release the clipped ponytail so it drops down. Split it into two halves. Lift the newest bottom ponytail straight up through the center and clip it out of the way. Bring the dropped halves down, add a small piece of hair from each side, and secure them together with a new elastic. Then loosen that fresh loop immediately before moving on.
That sequence is the foundation of this pull-through braid style. Once you find your rhythm with splitting, lifting, and tying, the rest of the braid will come together surprisingly fast.
Repeat down the first side, then mirror the same on the second
Repeat the same pattern farther back on the first side until you reach the middle of the head. Once that side is complete, unclip the untouched panel and build the second braid with the same spacing and placement so both sides land evenly from the back.
Once both sides match, give the style a final symmetry check from the back. The more closely the two sides mirror one another, the more polished the final result will look.
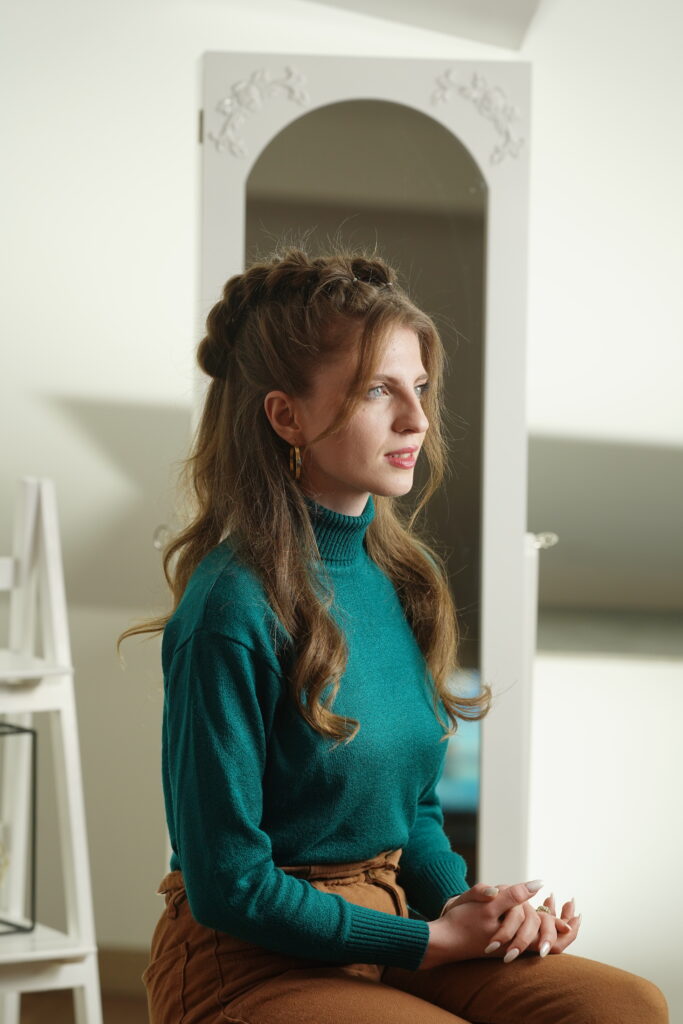
Once both braided panels are securely in place, give the style a final symmetry check from the back. Leave the lower lengths cascading loosely for a soft, romantic finish. Here is a look at how the completed Pull-Through Braid comes together from every angle.


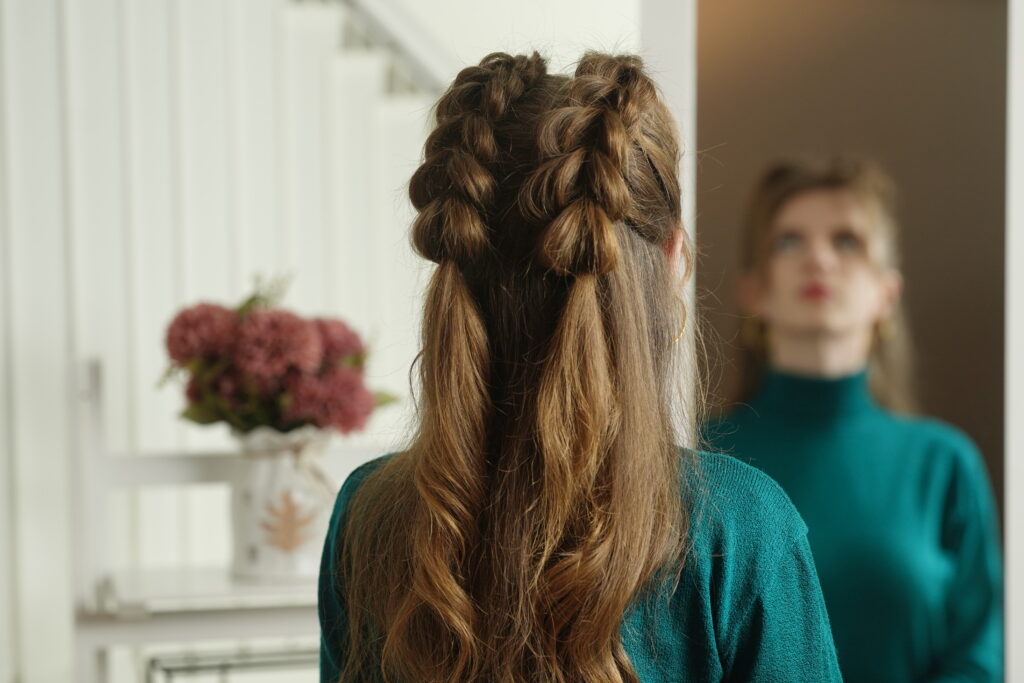

Finish off with a quick spritz of hairspray to smooth flyaways and keep your braids perfectly in place. The beauty of this pull-through technique is the contrast: it looks soft and breezy from afar, but incredibly detailed up close. By fluffing out those loops, you get a lush, voluminous style that never feels stiff.
It’s the ultimate cool-girl half-updo look that’ll instantly make you the center of attention without any effort.