
In recent times, hair coloring techniques that blend multiple shades have become popular. One such technique is hair color melting, often referred to simply as color melt.
Though color melting isn’t as popular as balayage, the stunning blended result of multiple shades is often mistaken for balayage. Many celebrities often choose color-melting techniques for their hair.
If you are interested in knowing everything about this technique, read this article till the end.
What Is Color Melt?
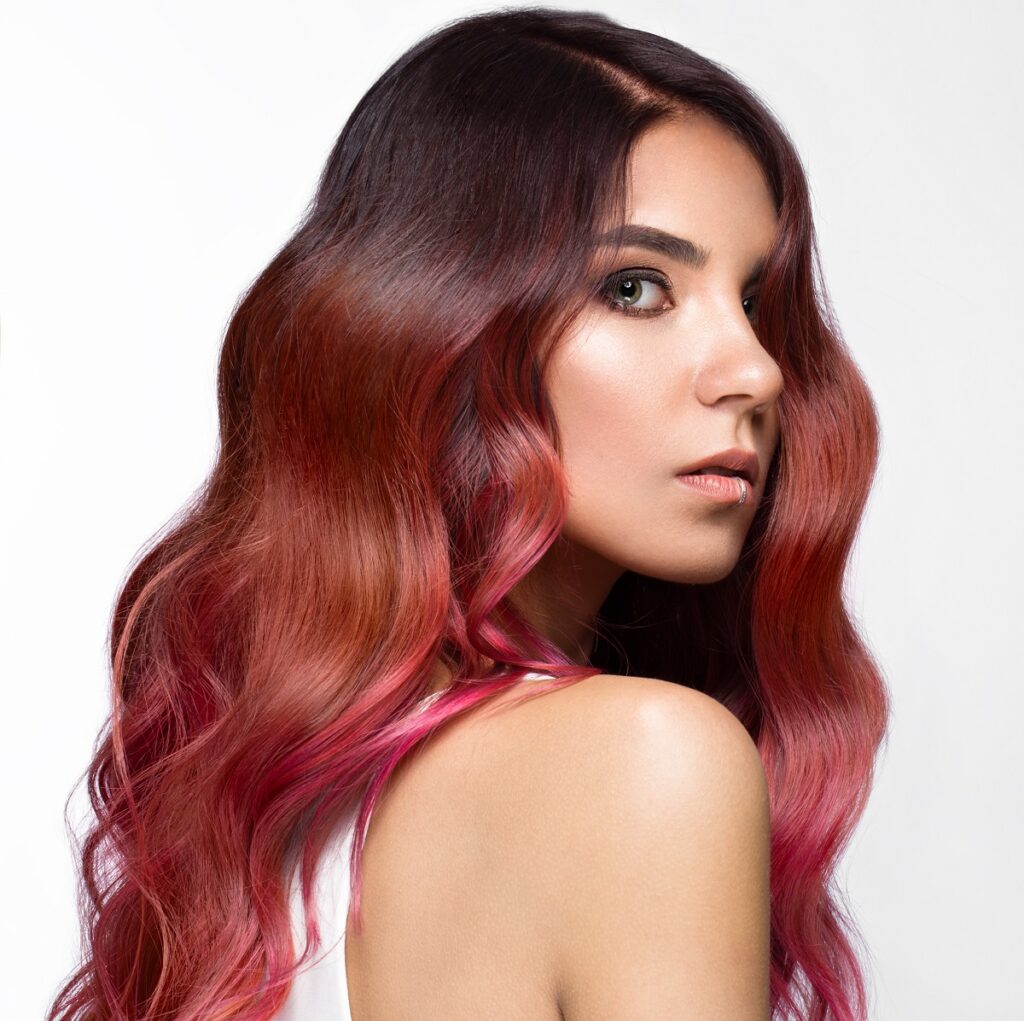
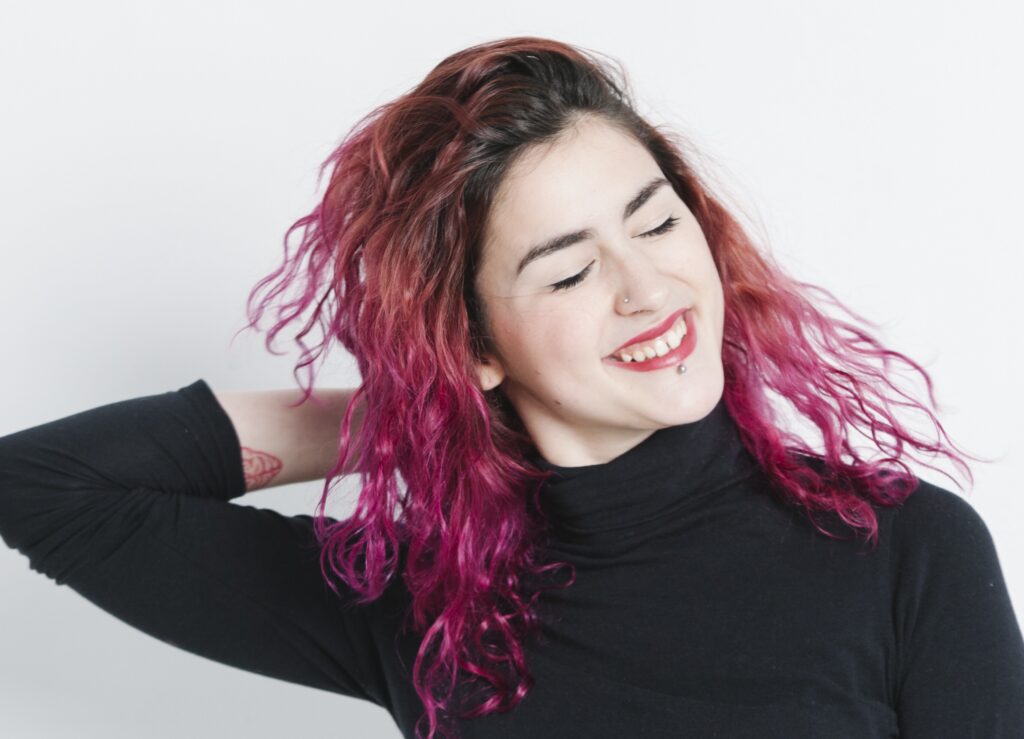
Color melting is a technique of overlapping colors that achieves a harmonious blending of three or more colors that looks like it could occur naturally.
The color transitions from dark at the roots to light at the ends, similar to an ombré. The key characteristic of color melt is the smooth, gradual transition between colors without any harsh lines or distinct color separations.
Here are the characteristics of the color-melted hair:
- Multiple shades are chosen, usually within a similar color family. These shades are meant to complement each other and create a natural-looking gradient.
- Darker colors are applied at the roots and a lighter shade towards the ends. Then, additional shades are added between these two for a more gradual transition.
- The most unique characteristic of color melting is the blending process. The colors together create a smooth, melted effect and less visible color separations.
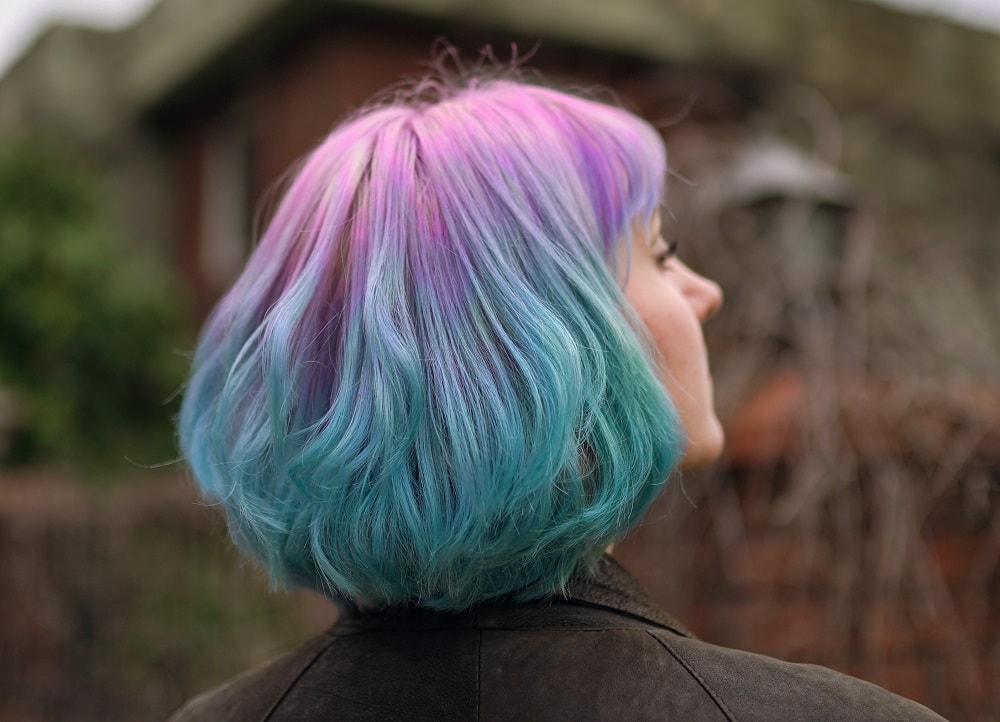
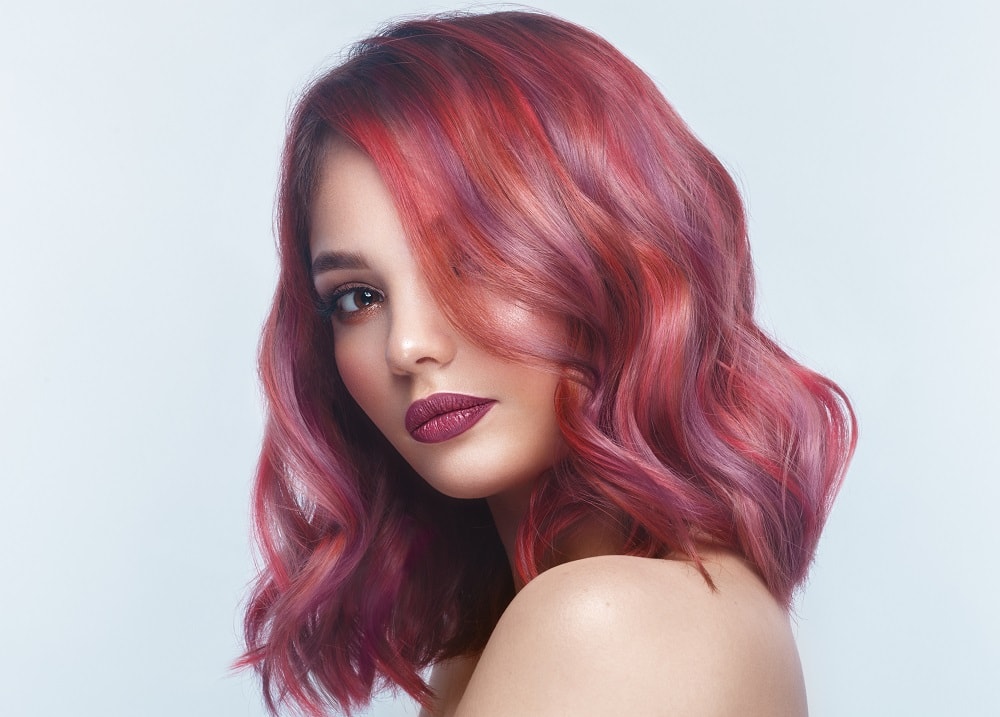
- The final look is a fluid and harmonious color transition along the hair length. It can be done with natural hair colors for a subtle look or with vibrant, unconventional colors for a more dramatic effect.
Color Melting Vs Other Highlighting Techniques
Three techniques take your hair from dark at the roots to light at the tips. These are balayage, ombré, and color melting.
Even some professionals get confused between these techniques. Let’s look at the difference between a color melt and other highlighting techniques.
Color Melt
If you like the depth and dimension you can get from a balayage, a color melt takes the variation to a whole new level. These two techniques are often confused, but there are key differences.
Lightening is not the central purpose of a color melt, unlike balayage, ombré, and highlights. A subtle blending of colors from the natural color at the roots with no harsh transitions is the goal of a color melt. The color variations should look like they occurred naturally.
Color melting is a perfect way to blend highlights as your roots grow out. While a balayage begins with shades lighter than your hair, a color melt begins with your natural root color or close to it.
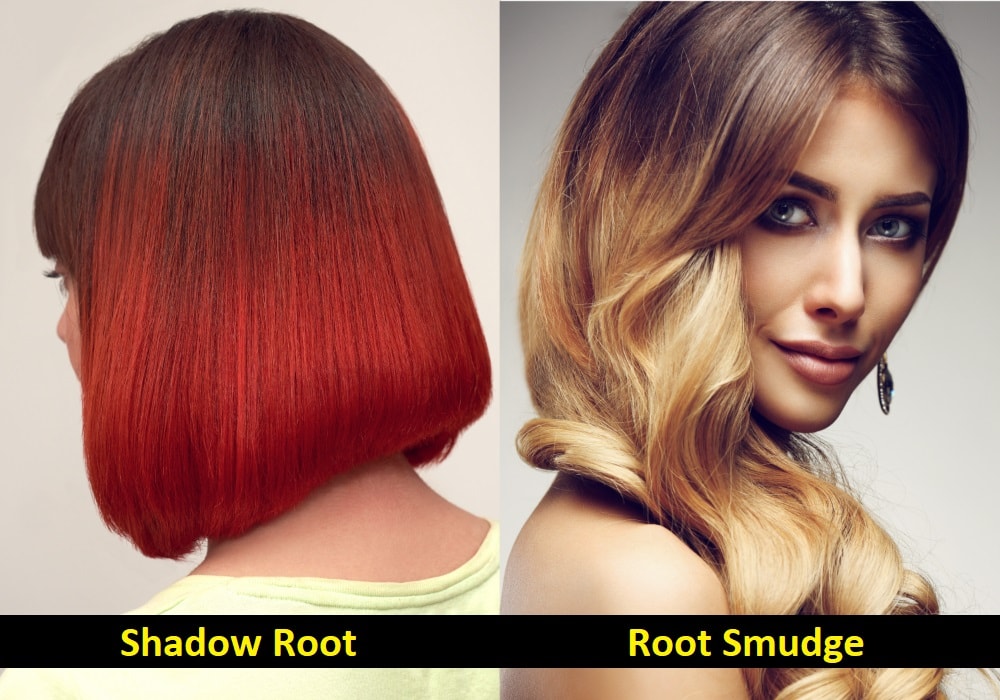
Shadow Root
A type of color melt that starts with a color darker than your natural roots that are melting into lighter colors is a shadow root. This technique helps to soften the transition of roots growing out from natural highlights.
A brunette who wants to lighten her hair and have a low-maintenance look may opt for a shadow root if she is happy with the results of her traditional highlights.
Root Smudge
A root smudge is another type of color melt for softening the demarcation between roots and traditional highlights. Instead of starting with a color darker than the natural roots, you’ll try to match them.
Balayage

Balayage is the name for a technique, not the finished look. The main difference between color melt and balayage is that balayage is the application technique used to lighten the hair, while a color melt is the technique of blending two colors together.
A balayage adds a natural-looking depth to your hair since the color is only a few shades lighter than your main color.
The stylist begins mid-shaft and uses more lightener as she moves down to the tips. This gives a similar effect to an ombré.
You can get a full balayage where the technique is applied throughout your hair for an overall lightening effect. You can also opt for a partial or mini balayage around your face or the upper half of your hair.
Ombre
The French word ombré means “to shade.” Ombre is a hair coloring style that typically features darker roots fading into a lighter shade towards the ends.
The hallmark of ombre is the two-toned look, with a distinct contrast between the darker roots and the much lighter ends.
You get a dramatic transition of color from the roots to the ends is less blended compared to color melt and the hair mostly splits into two color sections.
Traditional Highlights
Color applied by the balayage technique lies on the surface of the strands. The traditional highlighting technique uses foils to allow the dye or lightener to penetrate the hair from root to tip.
Your stylist intentionally selects portions of hair and subdivides those sections by weaving the tail of a comb to separate the hair.
The final result is a stark contrast between your base color and the highlighted sections. It adds a gorgeous dimension to your hair but needs more maintenance than the other highlight techniques. Because the color starts at your roots, it’s obvious when it grows out.
Two variations of traditional highlights are lowlights and baby lights.
Lowlights are the opposite of highlights. The color is darker than your base hair color. Lowlights add depth to your look without lightening your overall style.
Babylights attempt to imitate the understated variation found naturally in children’s hair. Colors closer to your base color offer a more subtle depth and highlight. Both styles use the same process as highlights.
How To Do A Color Melt Perfectly
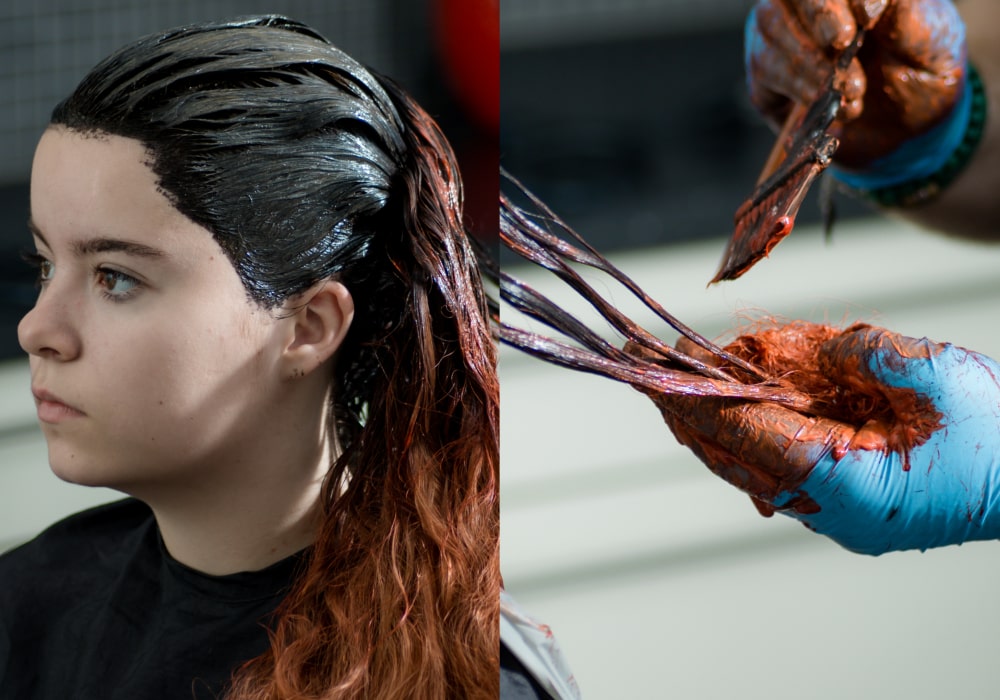
A color melt gives you depth and dimension throughout your hair like traditional highlights but is easier to maintain like a balayage. A well-applied color melt can last for months without needed touch-ups.
1. Prep the Hair
Before you apply a color, wash the hair and partially dry it, so it is damp for the color application.
One common problem that occurs when doing a melt is the darker color bleeding down or transferring to the ends. To avoid this issue, coat the ends with some light conditioner.
2. Choose Colors
The transition of colors down the strands should look natural. Pick at least three shades in the same color family.
3. Work in Sections
A color melt involves subtle shade changes to mimic natural hair. Color transfer from section to section is another problem you’ll face when perfecting this technique. Neat sectioning and wiping off your hands between working on each part keeps your blending tidy.
4. Blend and Smudge
Apply the darkest hue at your roots, the next color halfway down, and the lightest color near the ends.
Smudging refers to using your fingertips to mix the colors where they meet along the hair shafts. This technique assures that the color does not shift on the same spot on every hair, creating a natural-looking transition.
You can also use a wet brush to blend the colors along the section of hair. Or invest in a lightweight, synthetic Melt Brush. It has long soft bristles perfect for blurring colors.
Note: be careful you don’t pull too much of the dark color down to the lightest section.
5. Do the Front Last
Many people desire to lighten the hair that frames their face, as this aspect compliments the overall look of the melt.
To achieve this look, leave the front section for last and don’t blend the darkest color with the front pieces quite as much.
6. Protect Your Look
Avoid excessive use of hot tools and only use products for color-treated hair to extend the life of your color melt. Purple or blue shampoos will prevent your hair from becoming brassy. And color-safe hair masks can hydrate your locks when necessary.
What Are the Advantages of a Color Melt?
There are several perks to trying out a color melt instead of other hair color techniques.
A color melt lasts for months. It’s particularly great for brunettes who want to try out a blonde style but don’t want to maintain their roots every few weeks.
A perfectly executed color melt mimics the natural progression of colors. As hair is exposed to sunlight and natural elements, it oxidizes, making it lighter.
Hair without any dye or highlights is darker at the roots and gradually lightens near the ends.
What Are the Drawbacks of a Color Melt?
While a color melt hair gives a beautiful, natural-looking transition, it isn’t the only way to add depth to your hair color.
- Balayage and babylights add more dimension than a color melt.
- A color melt is more expensive upfront than other techniques.
- If you are not going to DIY your color melt, it may be tough to find a stylist with the right skills.