
One of the most significant parts of box braiding is the parting method. You can have the same number and size of braids but part your hair differently, and they will look completely different.
One can also have fewer braids but look fuller than another with more braids and empty spaces (when there is no special geometrical pattern), and guess why? Because of hair sections.
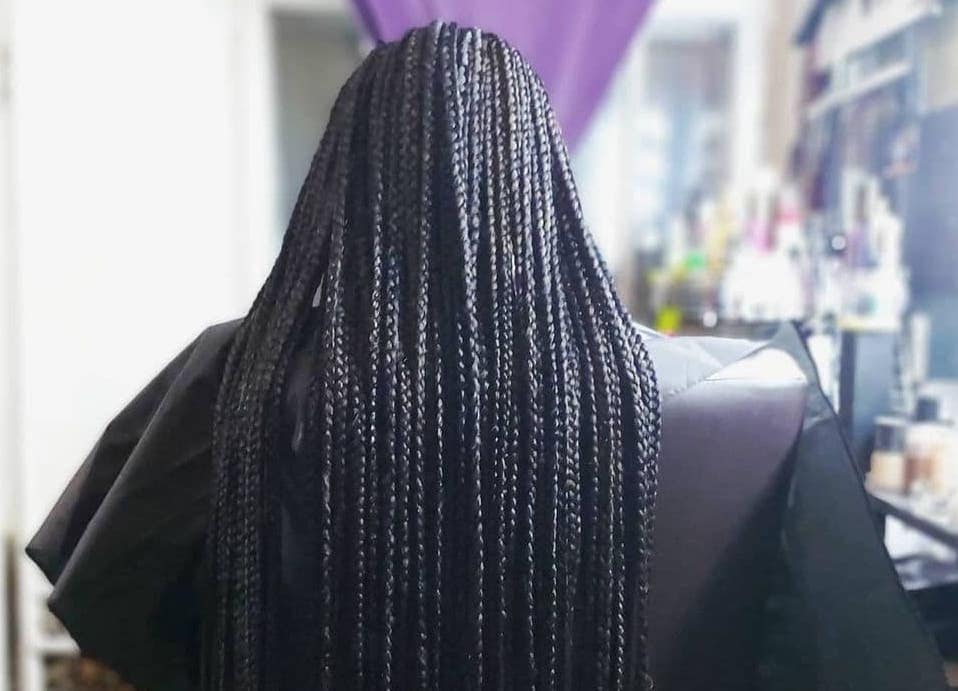
Most of my customers would like their box braids to look full, with no lines or empty spaces between them.
🔑 Key Takeaways
- Best for Fullness: The Brick Laying Method (staggering the braids like bricks) is the industry secret for full-looking braids with no visible scalp gaps.
- Prevent “Scalpiness”: Always make your sections smaller at the hairline, edges, and crown to ensure maximum coverage.
- For Geometric Styles: If you want visible, clean lines (like diamonds or triangles), use the Rubber Band Method to secure tension and maintain precision.
- Versatility is Key: A good parting pattern allows you to flip your hair to any side; avoid patterns that only look good in a single style (like a high ponytail).
In this case, no matter how thick or thin the natural hair is, a good pattern and some hair extensions would fulfill the expectations.
How to Section Hair for Box Braids: The ‘Brick Layer’ Braiding Technique
1. Start at the Nape: When sectioning the hair, you must start with the neck area, making the first straight horizontal line about 2cm high, depending on the hair volume, head shape, and preferences.
2. Create the Foundation: Grab the rest of the hair so that it wouldn’t bother you, and split the first line into squares for the first braids. This staggered method is called the Brick Laying (or Bricklayer) pattern: each new row is offset so the braids sit between the braids underneath, like bricks.
3. The Brick Layer Pattern: The second horizontal section, above the first one, would be the same, but this is where the Brick Laying pattern happens: the braids must fall right between the braids underneath (the vertical side of the square will hit the middle of the upper side of the square below).
4. Watch the Edges: Make smaller sections at the edges so you don’t see empty spaces when styling the braids. Keep getting higher with this method. Above the ears, you will start drawing semicircles instead of lines, and the squares around the hairline and edges should be smaller.
5. The Crown: When you get up to the crown, you’ll need to draw lines again, as for the neck area. Here, the squares will be smaller and smaller, as they will not be covered by other braids that come between those underneath.
6. The Front & Parting: When you get close to the forehead, you’ll make a middle or a side parting and start braiding from the sides up to the middle, where the last row of braids meet. There will be several straight lines up, so both the middle and side partings should work, as they are movable—provided that you follow the steps thoroughly.
That’s how you get no empty spaces between your box braids, looking fabulously full in any type of styling.
💡 Pro-Tips for a Flawless Look
Adapt the Shape: Your sections do not need to be perfect squares. You can apply this method to rhombuses or triangles as needed to fit the specific head shape you are working on.
Watch the Edges: Always make smaller sections at the edges. This is the secret to getting a fabulously full look with no visible scalp patches when the hair is tied up.
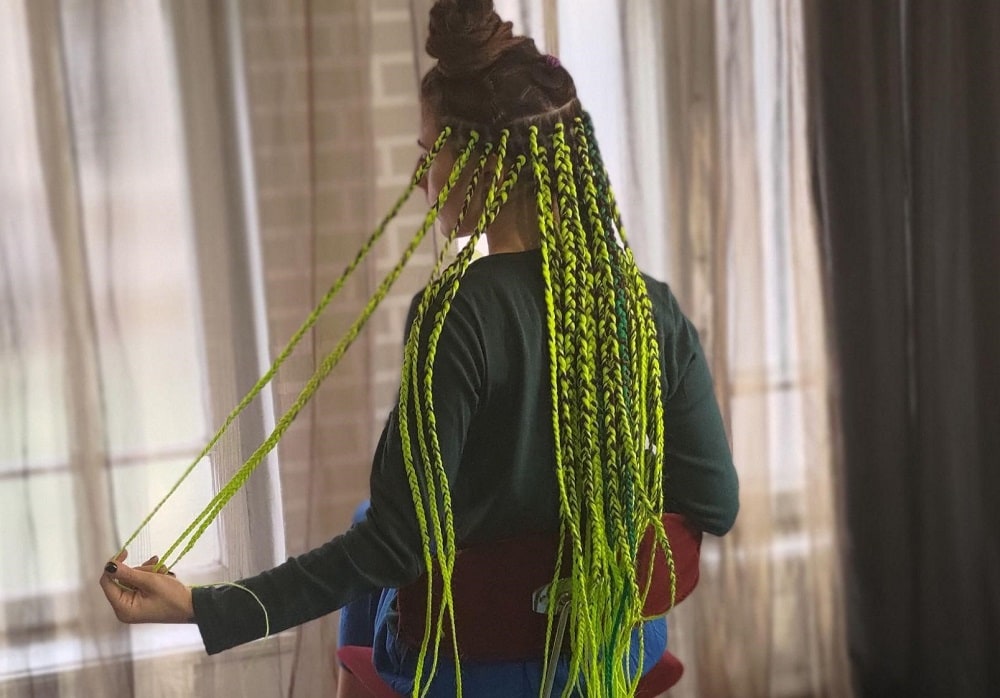
How Can You Part Hair for Box Braids with A Visible Geometrical Pattern?

If you want to see partings between braids, there are a lot of patterns you can try, but it needs to be very geometrical, and the lines need to be really clear.
- The partings can be rhombuses, triangles, squares, mixed with cornrows, or any other shape that looks good.
- Use a thin tail comb for parting the braids, and be as precise as possible when drawing the lines.
- The Rubber Band Method: For this method, it’s better if you section the hair and secure each box with small elastics first. It’s great for beginners because it locks in the parting and holds the hair at the root before you even start braiding, so your tension stays consistent and the pattern stays clean. Just don’t make the rubber bands too tight!
What if You Don’t Part the Hair Right?
If your option is the first method (Brick Laying), drawing super straight, clear, and geometrical lines isn’t very important, as the main purpose is for all spaces to be covered up.
Eventually, the only line that must be nicely visible is the parting that you choose to expose. But the pattern needs to be well done and adapted to each head shape and hair type.
I am not a fan of asking, “how do you like to wear or style your braids” and braiding them so they will only look good if you wear them in a ponytail or on a side. Braids must be good-looking in every style. You have around 2 months of waking up like that every single day and one must have the possibility to change their hairdo.
So, I will skip this option of hair parts that looks good in a certain style only and include it here in “not right” patterns.
- When you opt for a geometrical pattern, and you part the hair wrong, that’s going to be quite visible. Focus on the parting when you choose these types of box braids.
- The way you part the hair for braiding affects the appearance of braids the most. Doing it wrong would look wrong.
Keep on parting and partying!