
Many of the hottest hair trends today need more than regular scissors that can only make a blunt cut. That’s where the versatility of thinning shears comes into play for top stylists.
In addition, thinning shears can add a finishing touch to a haircut, making it easier to maintain while helping you achieve a precise look. These shears can feel overwhelming at first glance, but here’s how to use thinning shears for hair in 6 simple steps so you can cut like the best in the field.
What Are Thinning Shears?

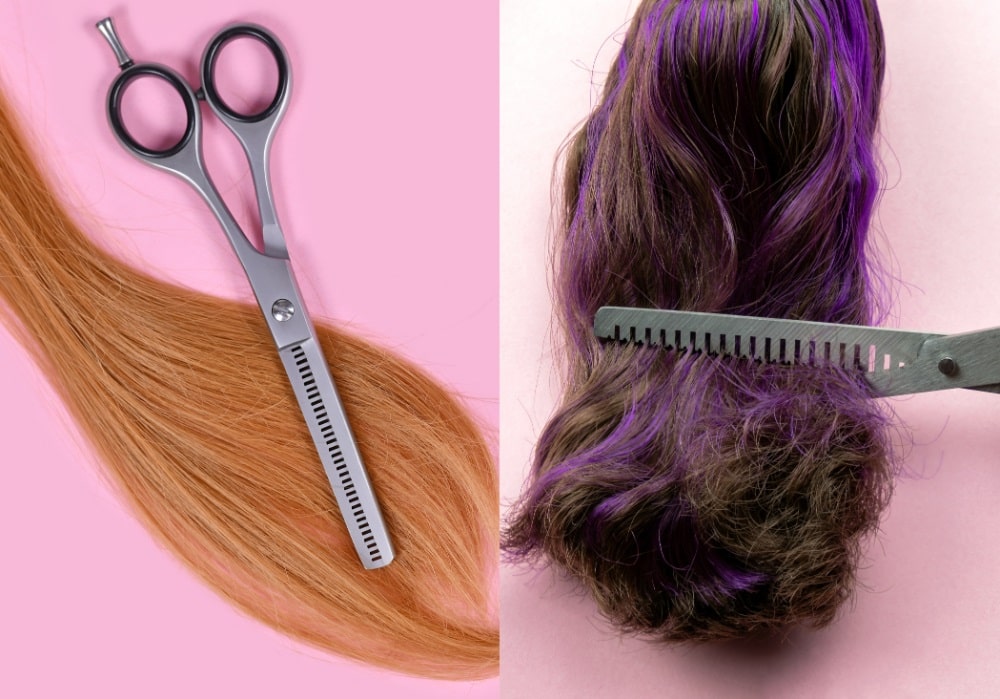
Thinning shears are part of the professional scissor family and can be used on women’s or men’s hair. One blade looks like regular scissors, while the other has sharp teeth that resemble a mini comb.
The purpose of thinning shears is to thin out sections of hair to create a specific style or blend. In addition, these shears can soften harsh lines, fade heavy cutting lines, and reduce excess bulk in certain sections.
However, it’s important to remember that thinning shears are not for shaping. They are used to give better control and manageability to the shape of a cut. The industry has dubbed this specific shear the ‘decorating’ shear.
Another way to look at the true purpose of thinning scissors is that they are like adding ‘the cherry on top’ of a great haircut.
Are Thinning Shears and Texturizing Shears the Same Thing?

Technically, no. Thinning shears and texturizing shears are not the same, though they are very similar. Texturizing shears may look like thinning shears, but if you look closely, the teeth on the comb side of the blades are a different size.
Although in some circles blending shears are grouped in with thinning and texturizing shears, the teeth are still different. Don’t worry. We’ll dive deeper into the purpose of other tooth sizes later.
What Do Thinning Shears Do to Your Hair?
Thinning shears are excellent for creating a sleeker look in a haircut. They work well on heads with too much hair when you are trying to achieve a specific style.
For example, if you have thick or curly hair that sticks out at the sides, thinning shears can remove excess weight without removing length, making the hair look more uniform.
How To Use Thinning Shears for Hair
Using thinning shears takes a delicate touch. Be careful not to hack at the hair, or you’ll end up with a hatchet job. Working in small sections is ideal when you are getting the feel of thinning shears.
Make sure you have the right shears for the job, and whatever you do, don’t use shears with a broken tooth. Here’s a step-by-step guide on how to use thinning shears safely and effectively.
Step 1: Choose the Right Shears
Choose professional-grade thinning shears that match the result you want. Expect to spend around $30 to $50 for a sharp, entry-level pair of steel shears; extremely cheap shears can bend and chew the hair instead of cutting it cleanly.
In general, the more teeth the shears have, the less hair they remove with each snip, while fewer teeth remove more hair. Work in small sections. You can always take more hair out, but you cannot put it back. Comb through and shake the hair out after every two snips to see the actual density loss.
Step 2: Dry and Comb Hair Thoroughly
Thinning shears work best on dry hair because you can see the difference in real time. So, make sure the hair is completely dry and combed thoroughly to ensure there are no knots or clumps before getting started. Tangles can cause you to misjudge where the hair needs thinning or blending.
Ensure your shears are professional-grade and sharp. If you feel the shears “pull” or “tug” instead of snipping cleanly, stop immediately; dull blades will crush the hair shaft and lead to split ends.
Step 3: Separate Hair into Sections
Divide your hair into sections so it doesn’t become too complicated when deciding where to cut. Within those larger sections, break the hair into smaller working sections.
It’s best to remember that working in smaller areas with thinning shears gives you more control over removing excess weight. Also, if you are texturizing, it allows you to get in there without removing too much at once.
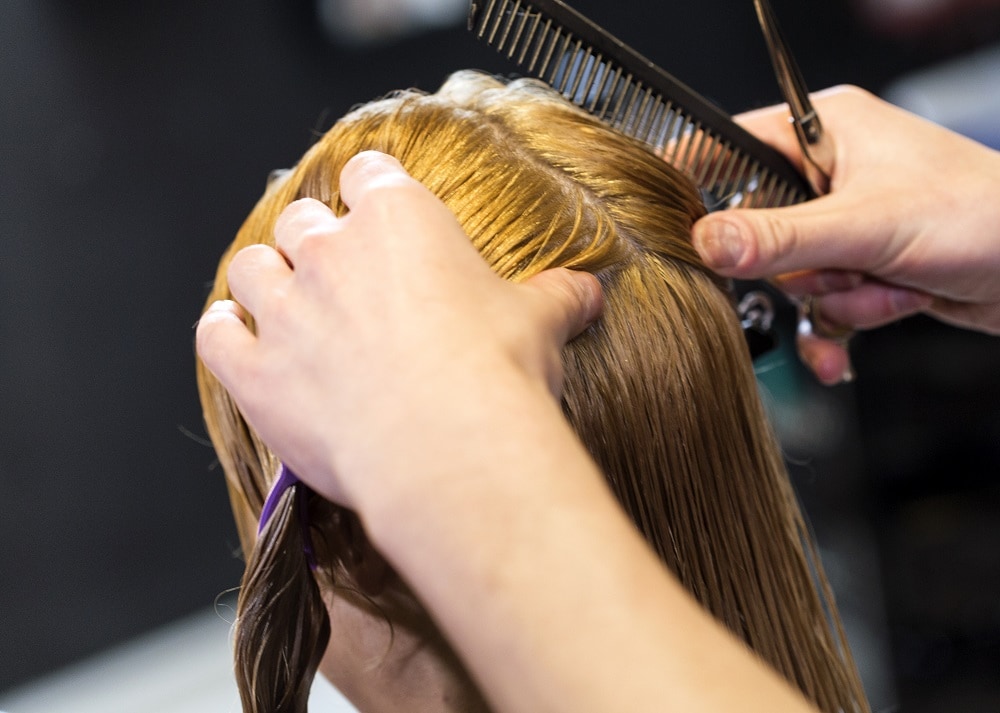
Step 4: Begin with Small Sections and Start at a Safe Distance
If you haven’t caught on yet, small sections are the theme here when it comes to using thinning shears successfully. Take your first small section and run your fingers through it to make sure it doesn’t tangle.
Next, pull the hair taut since you will be focusing on the mid-lengths and ends. Always start thinning at least 2 to 3 inches away from the scalp. For very long hair, start thinning at the mid-lengths, halfway between the scalp and the ends, to remove weight without creating short, prickly hairs at the crown.
Step 5: Angle Your Thinning Shears and Cut Through Hair
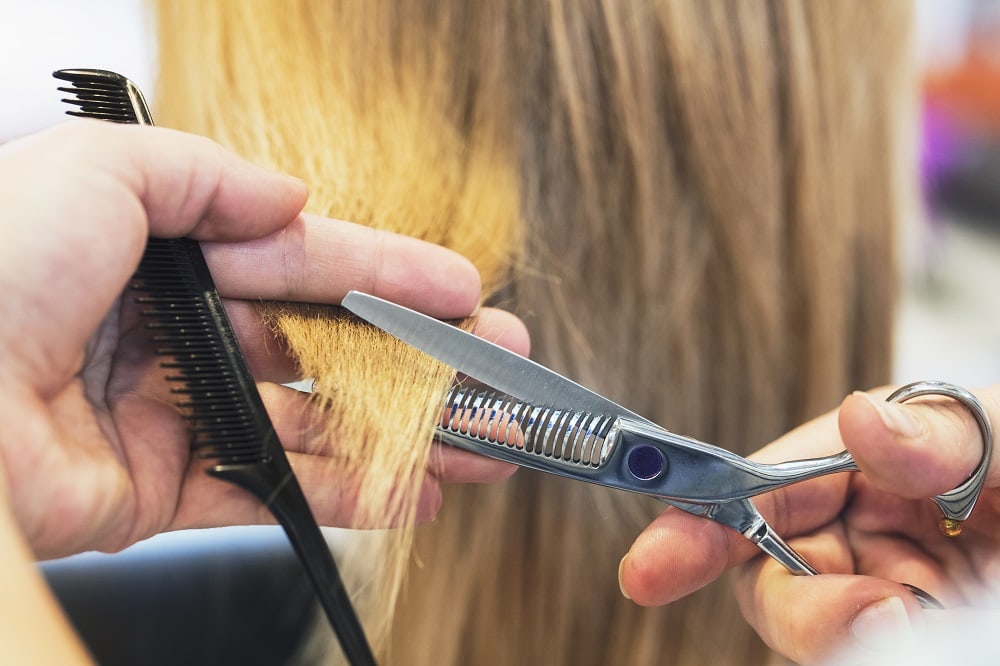
Once the section of hair is ready for cutting, angle your thinning shears and make the cut. Close the shears to snip, then open them completely before moving farther down the hair shaft to the next position.
For a natural blend, snip once, open the shears, move down an inch, and snip again. Never slide the shears through the hair while they are closed. Using a comb to remove all the cut strands is a good idea before taking another snip in the same section.
If the area needs a bit more removal, move slightly down toward the ends or work on a nearby section instead of cutting too close to the scalp. Don’t go overboard.
When thinning hair around the face or fringe, tilt the head forward and have the person close their eyes, or use a face shield to prevent tiny hair fragments from entering the eyes.
Step 6: Repeat for All Desired Sections of Hair
Once you’ve thinned each section, you may notice areas that need a little more removal. Be sure to move the hair around and run your fingers through it to confirm, since looks can be deceiving.
If the area still feels too heavy, re-section it and repeat the process to achieve your desired look.
Are There Different Types of Thinning Shears?

There are several types of thinning shears for different results.
The best way to remember it is that the more teeth there are, the less hair is removed, and the fewer teeth there are, the more hair is removed. This rule of thumb will help you pick the right shears for your hair.
6 to 12 Teeth (Chunking Shears)
The fewer teeth there are, the more hair is removed. Shears with 6 to 12 teeth can remove up to 80% of the hair per snip and leave an aggressive texture.
These are ideal for extremely thick, dense hair and should generally be left to experienced professionals to avoid creating holes.
14 to 20 Teeth (Texturizing Shears)
Shears that range from 14 to 20 teeth remove a moderate to heavy amount of hair, around 30% to 40%. These shears are best for heavily texturizing the hair and adding visual movement to the strands, so the hair has a breezy, piecey look.
They create a more whimsical blend with personality and style, resembling the look of a point-cutting technique.
20 to 30 Teeth (Finishing Shears)
Shears with 20 to 30 teeth remove a lighter amount of hair, around 20% to 30%. This range is perfect for most hair types that need a softer edge.
These shears are especially useful for bobs or layers because they remove the sharp “step” effect that regular scissors can leave behind. Use these shears when you want a manageable, wash-and-go style without obvious texture lines.
30 to 40 Teeth (Blending Shears)
Shears with 30 to 40 teeth remove a small amount of hair, around 15% to 20%. They are ideal for seamlessly blending sharp lines, smoothing dense hair without losing its structural shape, and providing a safer margin of error for beginners.
What To Consider When Using Thinning Shears for Hair
Thinning, texturizing, and blending shears are fantastic when used correctly. However, not every hair type will benefit from thinning shears. Some hair textures benefit more from a thinning shear than others, while some hair types should avoid the shears altogether.
Type of Hair
Let’s take a deeper dive into different hair types because not everyone should use thinning shears on their hair.
The four hair types are:
- Straight
- Wavy
- Curly
- Kinky
The thickness of your hair is what matters most when it comes to thinning shears. Thin hair should avoid shears with any number of teeth. There are much better ways to blend thin hair with a point-cutting technique. Thick, straight hair, on the other hand, is a great candidate for thinning shears.
As you move into naturally textured hair, the rules on shears change a bit. Wavy hair can benefit from shears when you want a softer edge in the style.
However, more caution must be used when you move into curly hair. Using blending and texturizing shears can give shape and remove some weight. Nevertheless, 5-notch teeth can remove too much weight and leave holes behind.
As for the tightest kinky curl type, the best choice is to avoid all thinning shears unless you have experience in the field.
Just like thin hair, shears can remove too much from tightly coiled hair. In addition, there are better techniques that can shape and blend this hair type.
What Type of Thinning Shears Are You Using?
So, now let’s look at the type of thinning shears you should use on each hair type.
Straight: Any type of shear can be used on this hair type if it is a thick head of hair. Blending shears will give soft edges, while thinning shears will reduce heaviness. Texturizing shears are perfect for enhancing a particular style.
Wavy: Just like straight hair, wavy hair can handle different types of shears. Soft waves can use some texturizing to enhance the contour of each curve. Thick hair may need a bit of weight removed with a thinning shear, while wavy hair can also benefit from a blending shear.
Curly: If you choose to use any shear on curly hair, make sure the thinning scissors are not ones with a low number of teeth. Professionals have significant experience in how to maneuver blending and texturizing shears, but if you’re a novice, use caution and work with small sections.
Kinky: It’s recommended to avoid all shears unless you have experience.
How Should You Hold Thinning Shears?
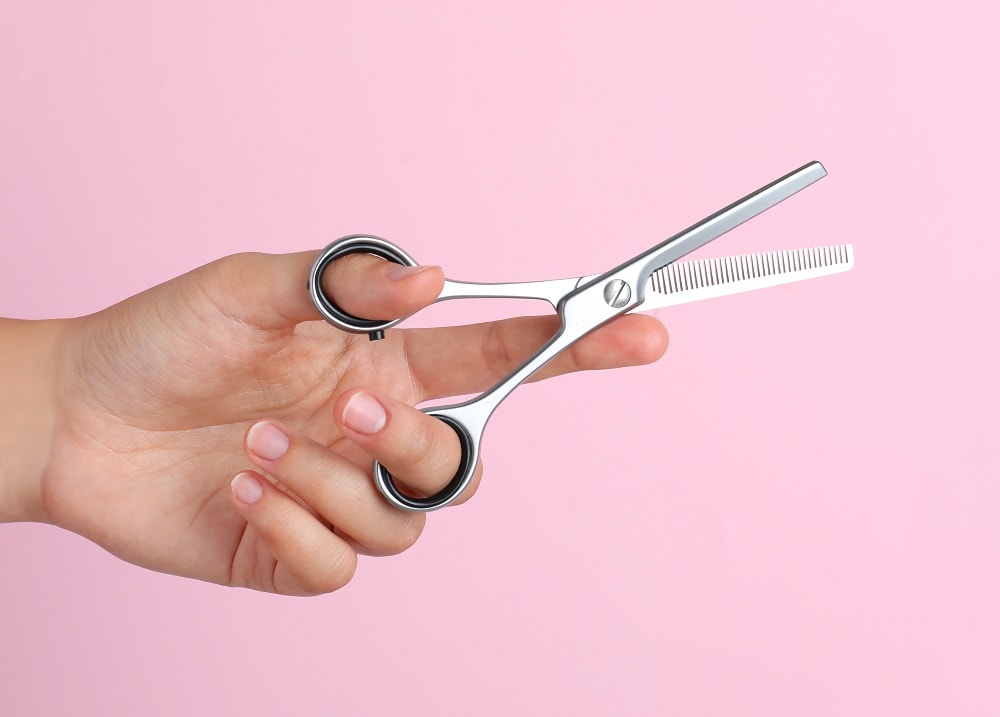
The grip for holding thinning shears is similar to how professionals hold scissors. This technique is one of the first lessons in precise haircutting. The same level of accuracy is needed when handling thinning shears.
Hold the shears with your thumb and your ring finger. This method is known as the western grip. Do not use your middle finger; your ring finger acts as the anchor in the handle for stability and control.
Be sure your fingers fit securely into the holes because if the fit is too big or too small, you won’t be able to hold the shears properly and get an accurate cut.
How Often Should You Use Thinning Shears on Your Hair?
Thinning shears should be used sparingly and only where needed. For example, it’s suggested that you trim your hair about every six weeks.
During that time, you may be able to do a light touch-up with thinning shears. However, it may be more beneficial to wait until every other trim before using them again to remove excess weight.
Can You Overuse Thinning Shears on Your Hair?
Thinning shears can certainly be overused. Haven’t you ever heard that too much of a good thing can go bad? The same is true for thinning, blending, and texturizing shears.
Using any shear too often can cause damage to the hair. It can also cause your haircut to look uneven as it grows out. You might end up with one heavy section and one thin section. Also, overusing shears can cause breakage or, worse, unwanted thinning.
So, be aware of how often you use thinning shears and how much hair you remove each time.
What Are Some Alternatives to Thinning Shears?
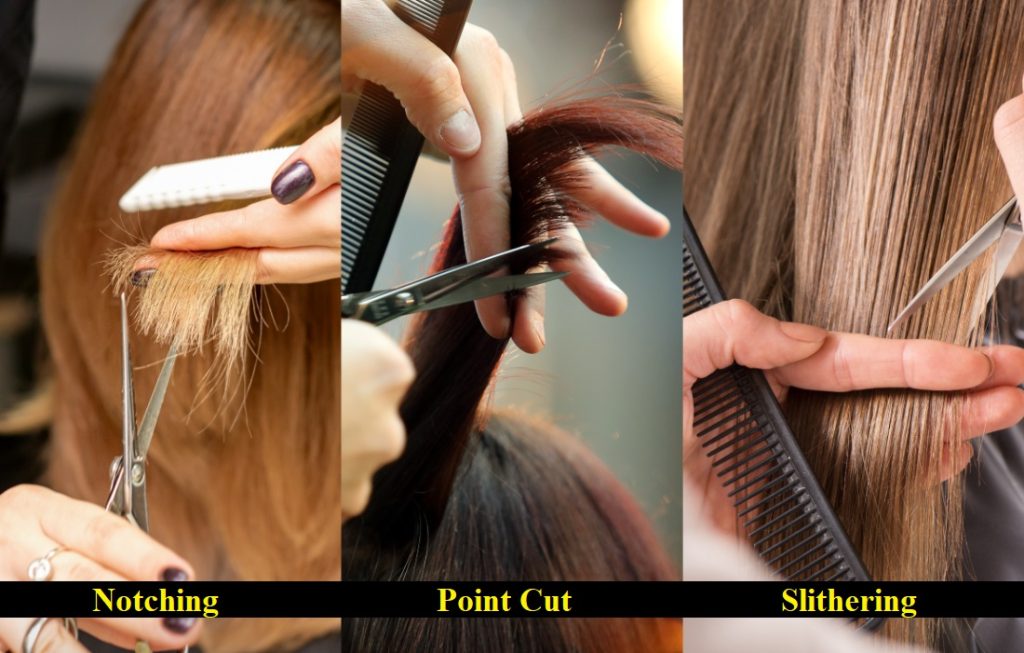
There are alternatives to using thinning shears when you want a sleek or lightweight feel for your hair. One non-cutting option is to dry your hair while using a paddle brush. However, this process won’t work for curlier hair types. So, let’s look at three cutting options to try instead of thinning shears.
Notching: Used on shorter hairstyles, this technique is perfect for blending and texturizing ends. It is done at a steep angle to thin out the ends and keep the hair from looking wide at the tips.
Point Cut: Perfect for hair with layers, this technique thins out sections around the head. It is similar to the notching process because it only focuses on the ends of the hair. The angle is small, but the cut is deeper than what is traditionally used in notching.
Slithering: An excellent option for straight or gently wavy hair. Take smaller sections and work at a slight angle, gliding from the mid-lengths to the ends. Avoid slithering on curly hair, as it disrupts the natural curl pattern and causes severe frizz.
Final Thoughts
There you have it. Cutting scissors can provide the desired length, but sometimes you may need thinning shears to achieve the weight removal, blend, and texture you want.
Now you know how to use thinning shears for hair in 6 simple steps. You also know what to avoid when it comes to using thinning shears, including sliding closed shears down the hair and using any shears with a broken tooth.
It’s fun to experiment with your hair to achieve that perfect, fresh style, but remember to use shears conservatively to prevent damage to your strands. When it comes to thinning shears, a little can go a long way.