
Thinking of a hairstyle change? Layers in medium-length hair are your answer.
Layers give that extra touch of style and flexibility to medium hair. You can wear them straight today and curly tomorrow, always looking your best.
With just a few tools and some easy steps, you can create that layered look in medium hair on your own, even if it’s your first time trying.
So, ready to give it a go? No need for a salon visit every time you want a fresh style! Let’s jump into how you can cut layers in your medium-length hair yourself.
Warning on Potential Damage: DIY cutting carries the risk of mechanical split ends and asymmetrical layering. If your hair has a high porosity level or a tight curl pattern, “blind cutting” (cutting parts you cannot clearly see in the mirror) can result in structural gaps that may take months of growth to correct.
How to Cut Layers in Medium Hair on Your Own
Medium-length layered hairstyles can add vibrancy and depth to your hair, creating shadows and highlights that make it look more vibrant and dynamic. Here’s how you can cut shoulder-length hair with layers:
1. Prepare Yourself
Cutting your own hair can be nerve-wracking. So you need proper preparation to get the desired result and also make it a pleasant experience.
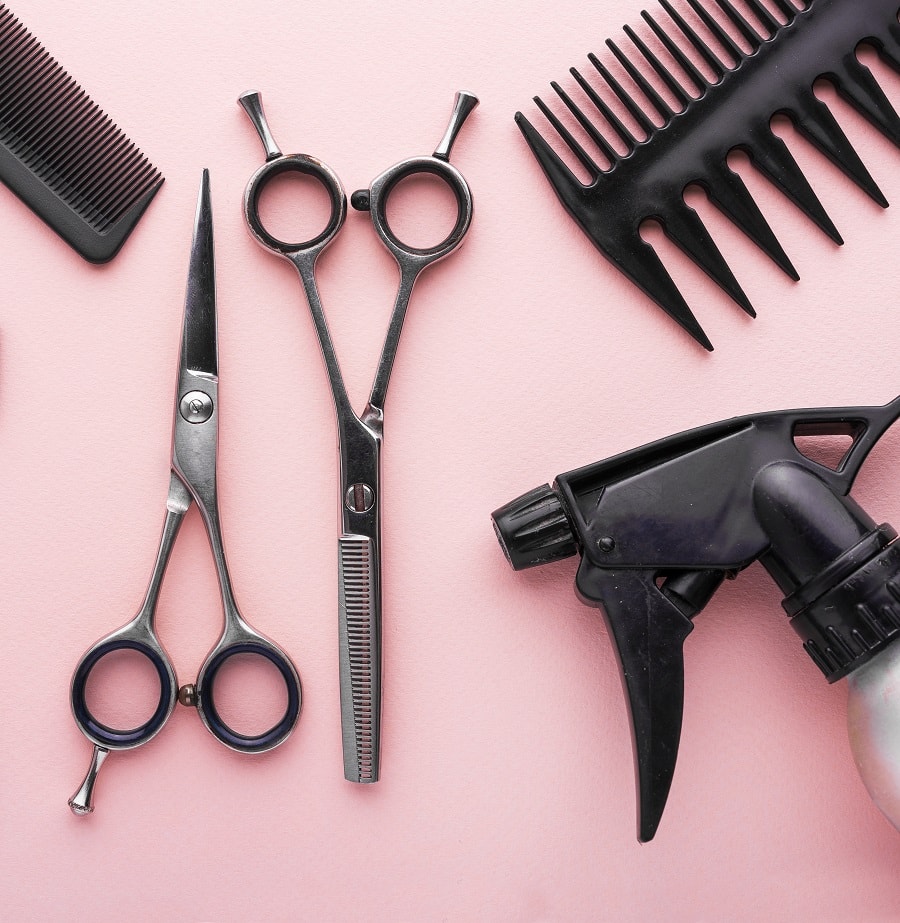
The first thing you should ensure is that you have all the tools you need. The quality of your tools can have a significant impact on the end result.
Here are the necessary tools that you’ll need to cut layers in medium-length hair:
Sharp Hair Scissors: Using regular household scissors will crush the hair shaft, leading to immediate split ends. Look for stainless steel shears specifically labeled for hair. A convex edge is best for smooth slicing, while a beveled edge is great for beginner stability. Hold a single-ply damp tissue and try to snip it; if the blades snag, tear, or “fold” the paper instead of slicing a clean line, they are too dull for your hair.
Fine-toothed Comb: Use a wide-tooth comb or brush to detangle your hair first. Switch to the fine-toothed comb only once the hair is knot-free to create the tension needed for cutting. It helps in achieving a straight cut and ensures even distribution of hair.
Hair Ties or Clips: These will help in sectioning your hair. Sectioning is crucial for managing your haircut step by step, especially when layering. They help in keeping hair that you’re not cutting out of the way.
Spritz Bottle with Water: Keeping your hair slightly damp can make it easier to cut and manage. A spritz bottle allows you to moisten sections of your hair as you go, ensuring an even cut. When dampening the front sections, close your eyes or shield them with your hand to prevent water or product mist from causing irritation.
Once you have all the tools it’s time to create the right environment. It is just as important as having the right tools because cutting your own hair can be nerve-wracking.
Take a deep breath and try to find a well-lit space with a good-sized mirror. It’s better if you can do it during the daytime, as natural light provides the most accurate representation of your hair.
Use bright lights to see clearly if you are cutting your layers in the evening or at night.
Put on some calming music and wear something that you wouldn’t mind getting a bit of hair on. A t-shirt or top with a simple neckline is a better choice as no stray hair gets trapped.
Stand over an easy-to-clean surface. There will be hair clippings, and setting up over a manageable area will make cleanup a breeze.
2. Prepare Your Hair
If you have all the tools ready, it’s time to decide on your layers type. Your cutting style will mostly depend on your chosen style.
It is possible to cut long layers on your medium hair, but we recommend choosing short to medium layers for your hair that is not longer than your shoulder.
You can also mix your layered styles. For instance, you can cut a medium-layered bob with or without bangs or vary the length from shoulder to collarbone layers.
After choosing your style, clean your hair for a successful cut. Natural oil and product build-up can weigh down your hair at the roots, so make sure that your strands have been washed.
Safety Note: Ensure your scalp is healthy before starting. If you have active sores, redness, or excessive scaling, wait until the skin has healed before performing a DIY cut.
It’s best to work on your hair while it’s dry, especially if you have curly or wavy strands. This gives you more control and a better idea of what the final result will look like.
If you have straight hair, you can also cut it while it’s 80% air-dried or slightly damp to create sharp and precise lines. Comb through your hair to remove tangles.
3. Divide Your Hair Into Sections
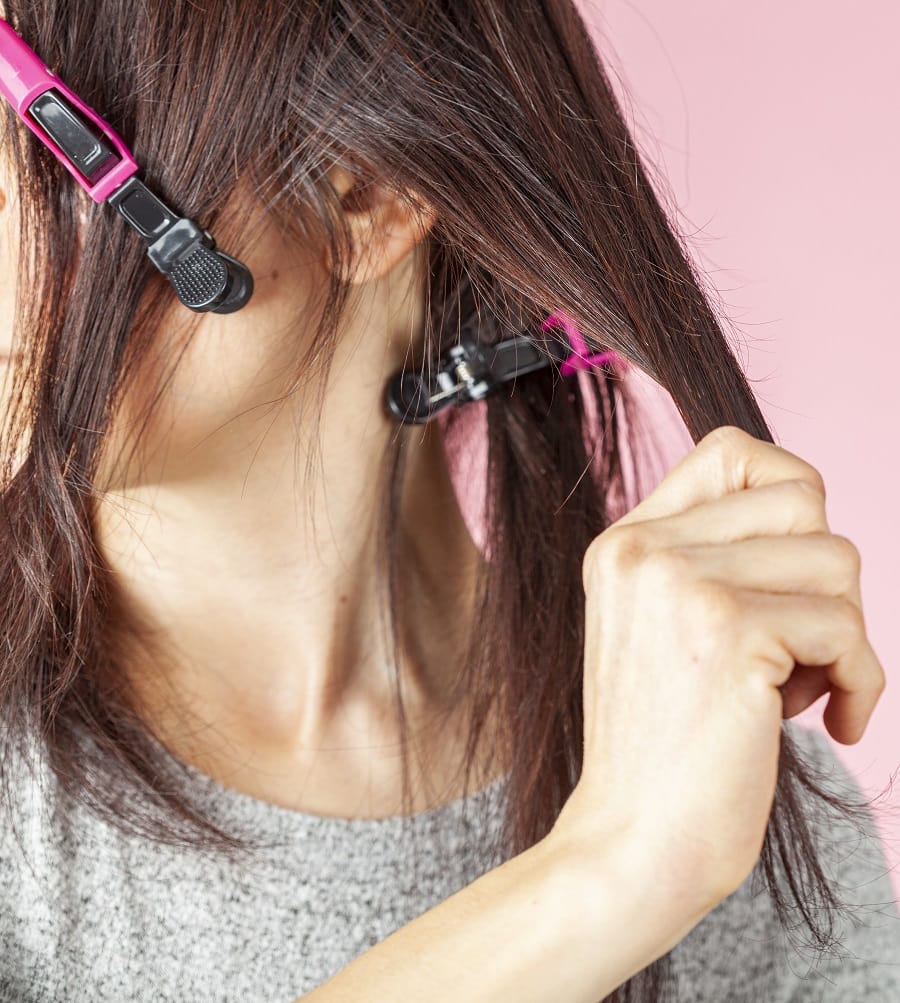
You’ll mostly be working with the front and top portions of your hair to create bouncy and beautiful layers. Leaving the bottom part unlayered will help keep your hair full and voluminous.
Note for Curly/Coily Hair: Do not leave the bottom section completely unlayered. To avoid a ‘triangle’ shape, use ‘vertical layering’ on the bottom third to remove bulk and allow your curls to stack naturally.
So, before you start snipping, once the top layers are cut, drop a small ‘transition’ section from the bottom third and blend it into the length of the layers above using vertical snips. We’ll work on the lower part later.
Next, separate your hair into four quadrants: down the center from forehead to nape and ear to ear across the top. This ensures you can reach the back sections accurately. Decide on which side you want to work on first. In this guide, we’ll start with the right side of your head. Now, you’re ready to start layering!
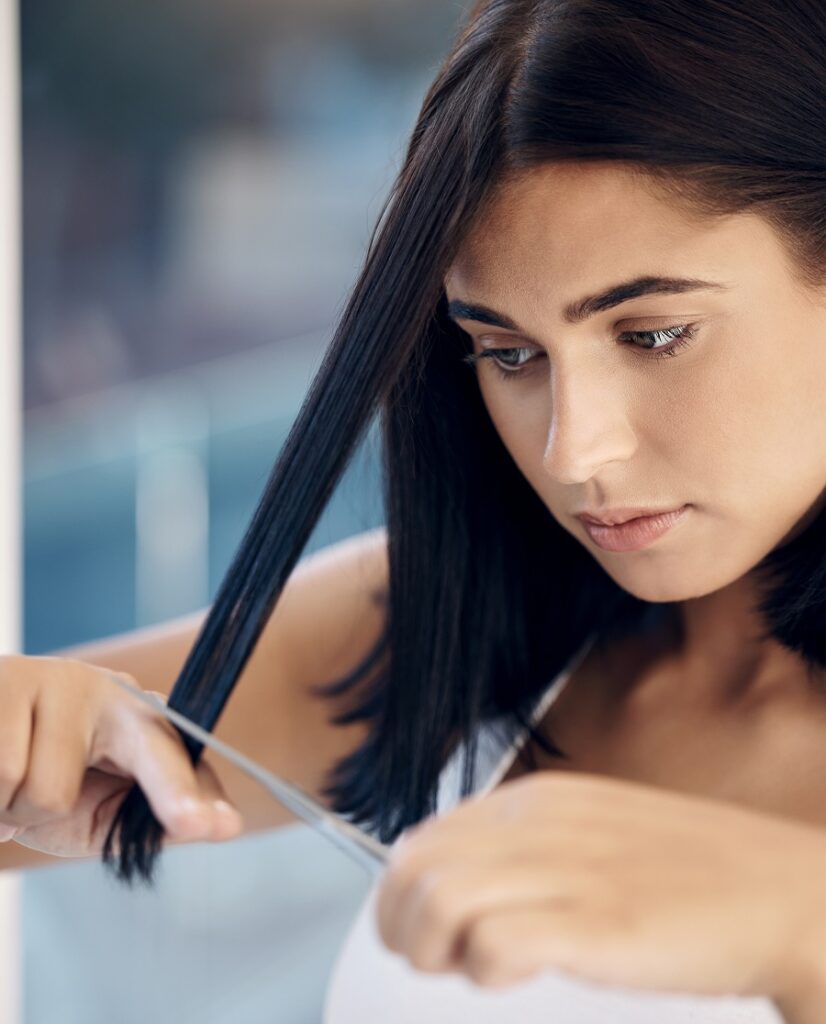
4. Slowly Cut the Shortest Layer
Using your comb, take a half-inch section of hair from the middle part to the right side. This section will be your shortest layer, so take a moment to decide how long you want it to be.
A first layer that ends between the cheekbones and chin will look flattering on most face shapes.
Comb the hair straight up (90-degree elevation). To ensure a soft blend, over-direct the side sections slightly toward the center-top as you cut. This maintains length toward the perimeter and prevents a unblended, harsh line.
Cut the hair straight across first to set your length, then go back and use the point-cutting method (snipping into the ends vertically) to create soft, blended edges that don’t look choppy.
If you’re not familiar with point cutting, it’s a technique that involves cutting the hair vertically instead of horizontally. This allows layers to transition smoothly and blend together with no chunks or blunt lines.
Repeat this step on a half-inch section on the left side of your hair, and check to see if both sides have the same length.
5. Add the Lower Layers
Next, go back to the right side of your hair and start working on another layer. Take a one-inch section of hair below the previous section, and cut it slightly longer than the first layer using the same steps mentioned above.
Continue adding lower layers on both sides of your hair by working on one-inch sections at a time. Small sections allow the layers to blend together seamlessly, but you can cut using bigger sections if you want each layer to be more distinct.
A good rule of thumb is to work slowly, using small and careful snips. You can always trim more hair if you want to decrease the length, but you can’t undo it if you cut it too short! If you’re cutting damp hair, remember that it’ll look even shorter than that when it dries.
Periodically check to see if both sides have even-looking layers, and do a bit of point-cutting to match the lengths.
6. Trim the Lowest Section of Your Hair
Now that you’ve achieved shape, softness, and movement on the top layers of your hair, it’s time to work on the lower portion of your hair that we sectioned off earlier in Step 3.
Clip or tie back the upper two-thirds of your hair that you’ve just finished layering, and let down the bottom one-third.
Use your comb to divide the hair down the middle, and bring each side to the front of each shoulder where you can see them.
These two sections will be the longest parts of your hair, and it’s up to you how much or how little you’d like to trim.
Keep your head straight and comb the bottom section flat against your back or shoulders (0-degree elevation). Cut the length without lifting the hair away from your body to keep the ends thick and full.
Do the same on the other side of your hair, and do some point cutting afterward to make sure both sides are even. We won’t be doing any layering on the lowest one-third section to allow your hair to retain its natural volume.
7. Assess and Refine Your Layers
After you’ve successfully cut both the top and bottom sections of your hair, the next thing to do is assess your work!
Remove all clips and split your hair down the middle. Neatly comb each side forward and keep an eye out for noticeable differences between the two sides.
Additionally, ensure that your top and front layers gradually blend into your overall hair length. A good tip is to stand in front of a mirror and view your new hairdo from all angles.
If you notice any disconnected-looking layers, do some point cutting to soften the transition between the two lengths.
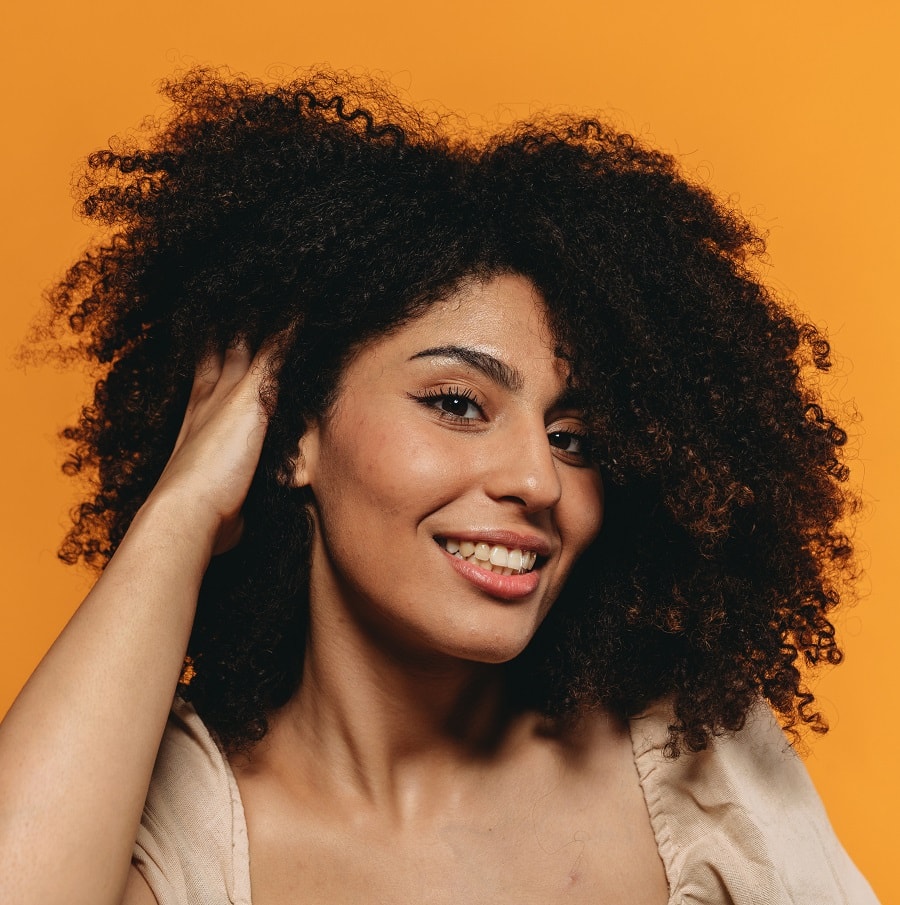
Trim and make small adjustments until you end up with medium hair layers that are satisfying and symmetrical. You can also curl your medium-layered hair for more styling options.
Maintaining Layers in Medium-Length Hair

While layers can give your hair a lively bounce, they can also become uneven over time. Maintaining layers on medium-length hair depends on the layer type.
For example, you can easily maintain layers on medium hair if you have simple side-parted layers or it may require a lot of maintenance if you have bold choppy layers.
Consider getting regular trims every 6-8 weeks. It will keep your layers sharp and prevent them from growing out into an undefined shape.
Take a round brush and blow-dry your hair, going inwards to frame and flatter your face. Keep the blow dryer nozzle 3 inches away from the hair and always point the airflow downward from roots to ends to seal the cuticle. Never hold the heat stationary on one spot.
Don’t forget to use a heat protectant to keep your hair healthy and prevent frizz.
If you have curly hair, a diffuser is also a great choice. Diffusing the tips of each layer will enhance hair volume and add bounce to your medium-length hair.
Now, you can cut layers in medium-length hair by yourself and maintain it confidently at home following the steps mentioned in this guide. Cut carefully and confidently to get perfect face-framing layers at home.