

One of the reasons braided bun hairstyles are so popular is because of their versatility. They range between casual coiffures and fabulous formal ‘dos, but you can wear them anywhere, for anything, and you’ll fit in seamlessly wherever you are.
The good news is that if you know how to braid and how to twist a killer bun, you can probably create most of these styles yourself. You can also flash your favorite photo at your stylist, and she or he will work some magic on your hair.
Beautiful Braided Bun Styling Ideas
Cocktail party, birthday party, girls’ night out. Throw your hair into a braided bun hairstyle and head out the door like you just spent hours and a small fortune on your hair.
Braids are funky, buns are classic, and the combination of the two is sheer perfection. Don’t believe it? Check out these hairstyles.
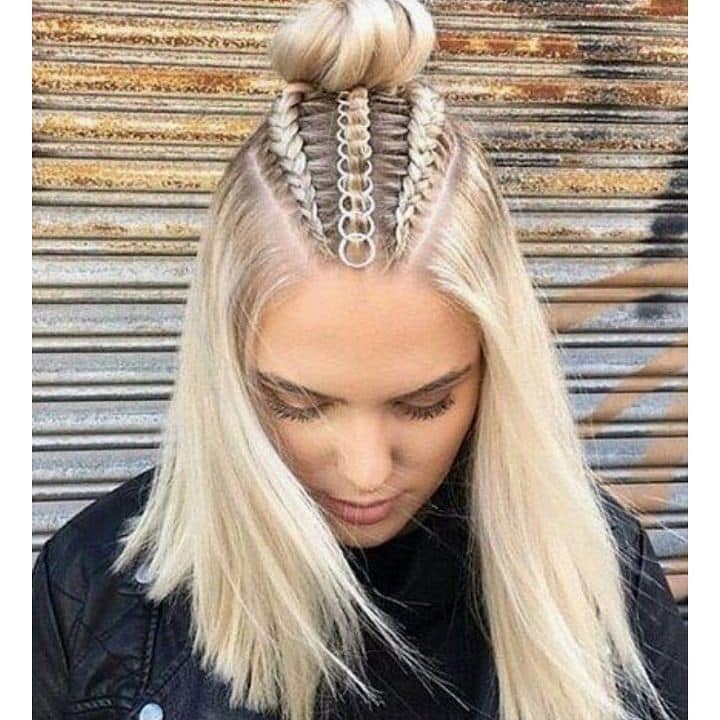
1. Top Knot with Jumbo Box Braids
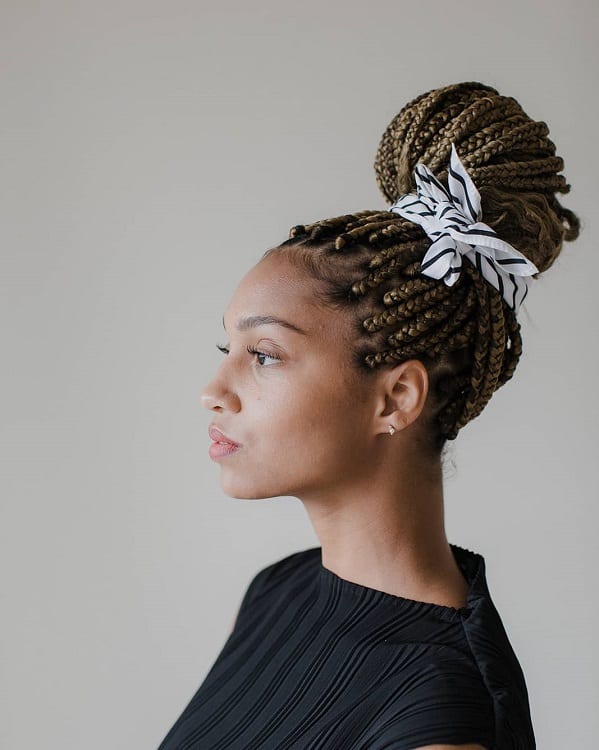
A high top knot made from box braids keeps everything lifted and off your neck. It is a clean, easy finish for casual days.
How to style: Flip your head upside down and gather your box braids at the crown. Secure with a thick, wide band. Split the ponytail into two sections, twist each section around the base, then tuck the ends under the band.
Who should try it: Anyone with medium to long box braids or twists.
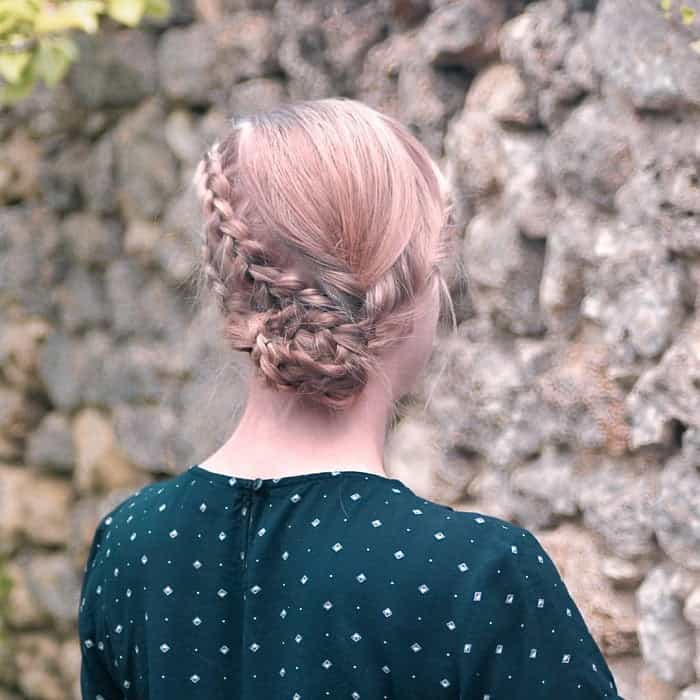
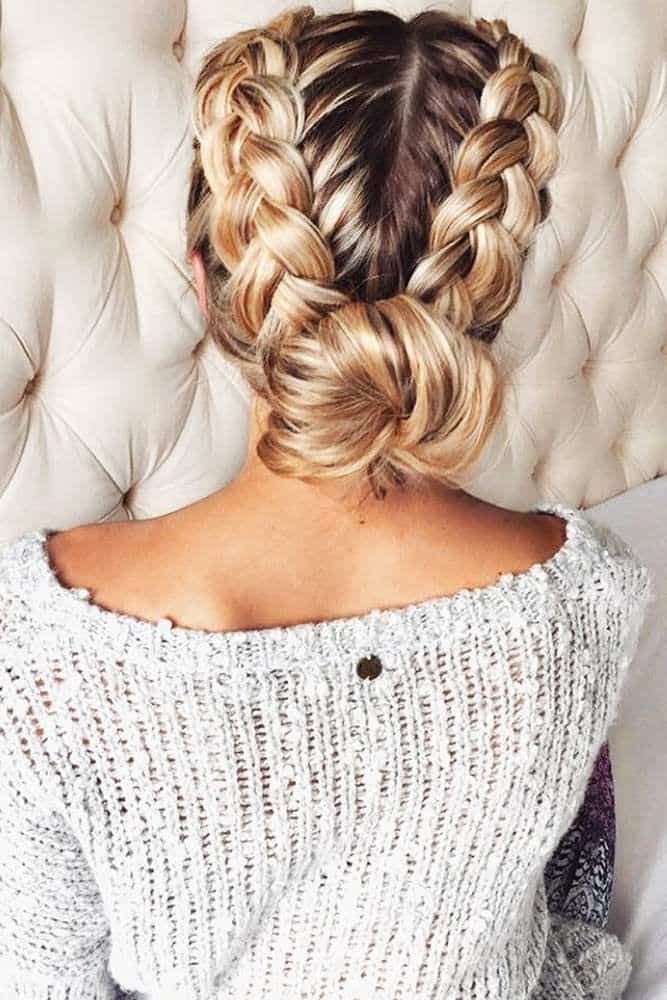
2. Double Dutch Low Buns
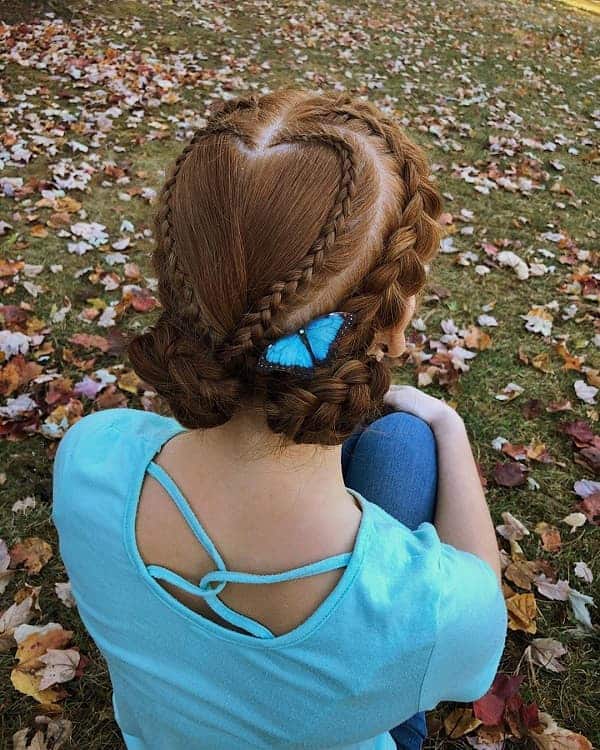
Two Dutch braids that end in low buns look playful but still tidy. This one is great when you want your hair secure and off your face.
How to style: Part hair down the center. Dutch braid (underhand) from the hairline to the nape on both sides. Secure the two pigtails, tease the ends for volume, then pin each one into a messy bun at the nape.
Who should try it: Round and heart face shapes.
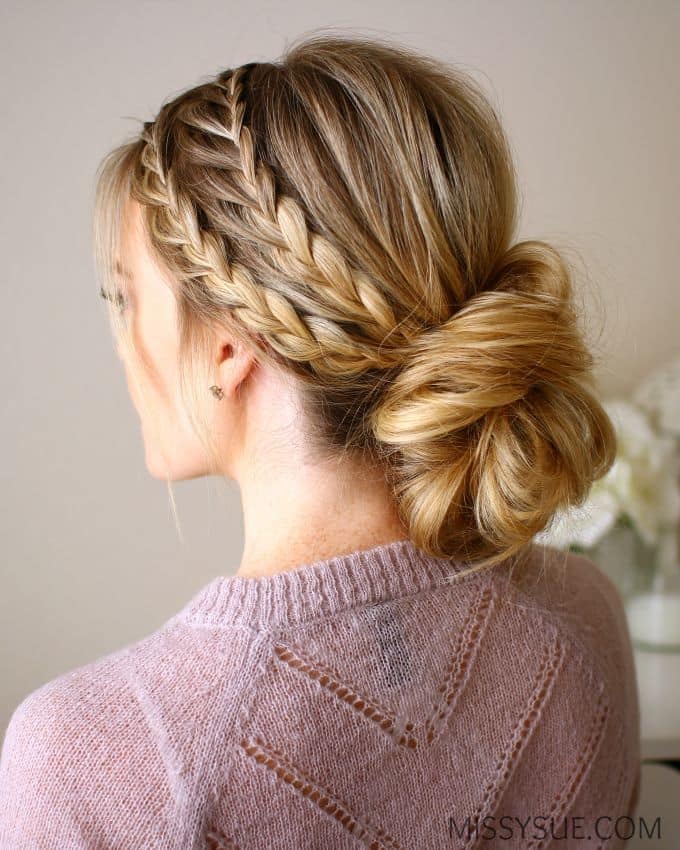
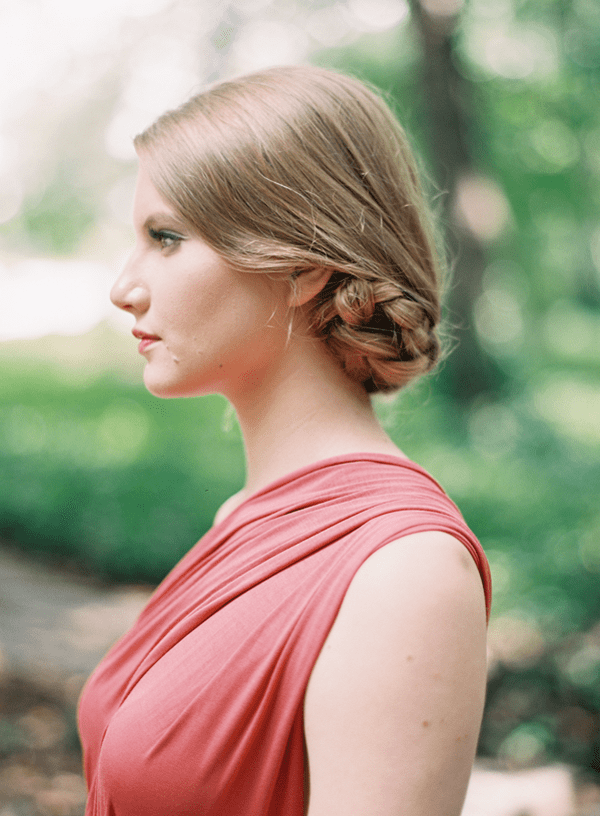
3. Low Braided Chignon with Side Cornrows
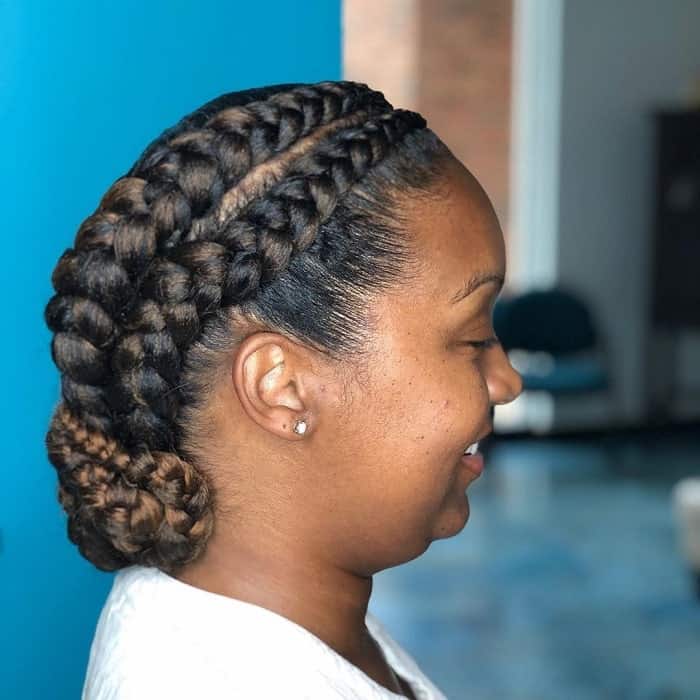
A low chignon with cornrow detail reads elegant and event-ready. It is a strong choice when you want a protective style that looks formal.
How to style: Section ear to ear. Cornrow the sides back toward the nape. Gather the remaining hair into a low ponytail, braid the ponytail, then coil it into a flat chignon at the nape.
Who should try it: Natural textures (Type 3 and Type 4).
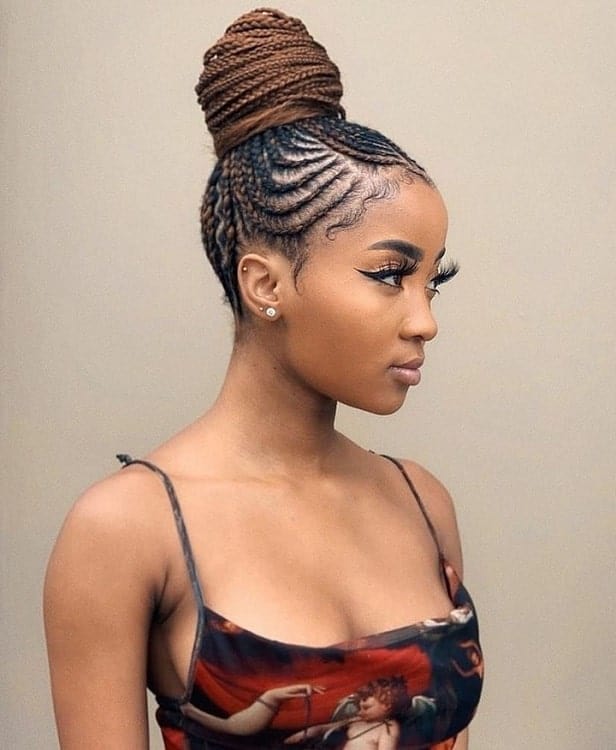
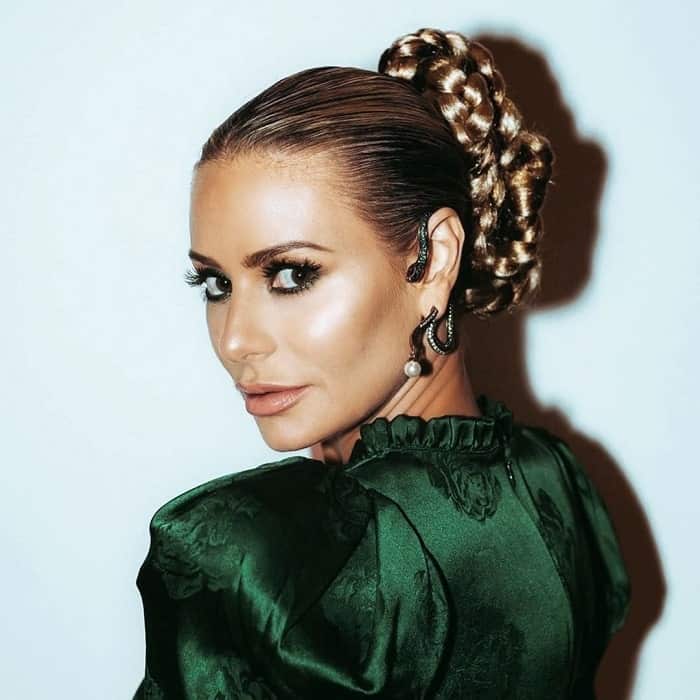
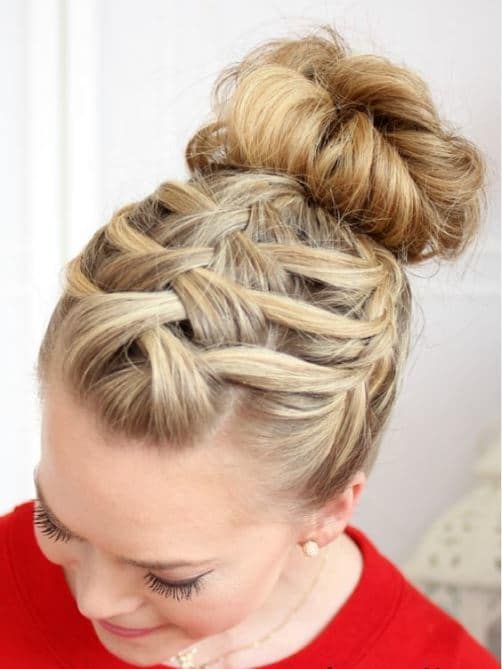
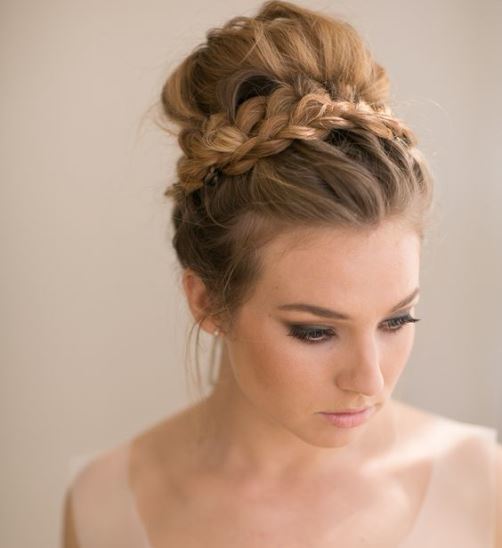
4. Stitch Braids into High Bun
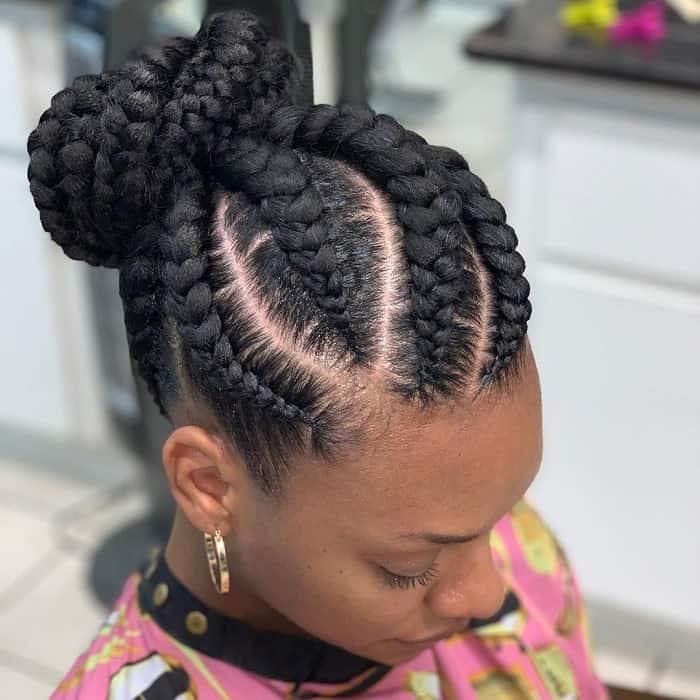
Stitch braids into a high bun look sharp and graphic from every angle. The height adds lift and keeps the finish sleek.
How to style: Create clean, precise parts with a rat-tail comb. Feed in extensions as you braid to form the stitch lines. Wrap the ends into a high donut bun.
Who should try it: Oval and round faces. The height adds lift.
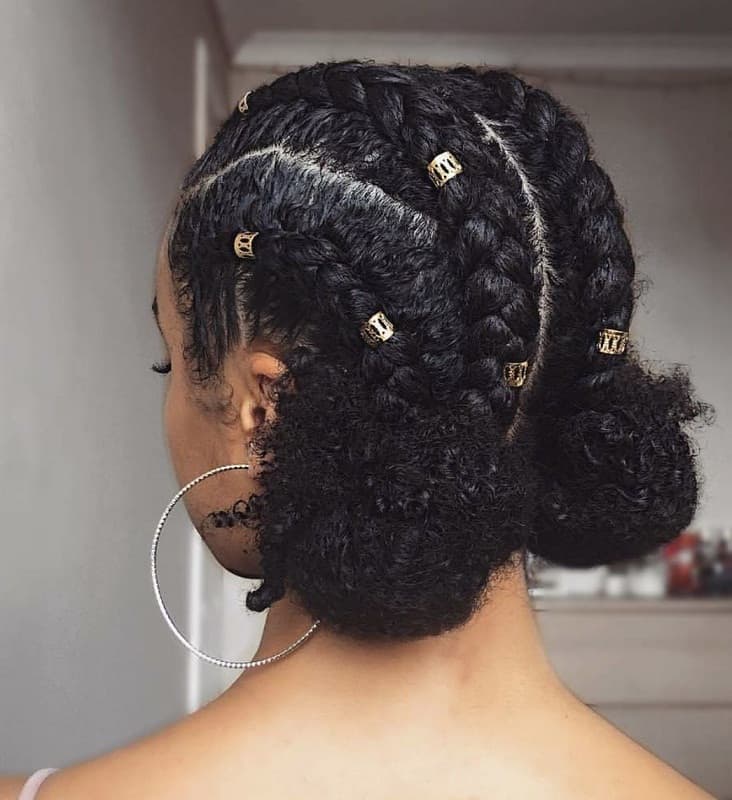
5. Fulani Braids Top Knot
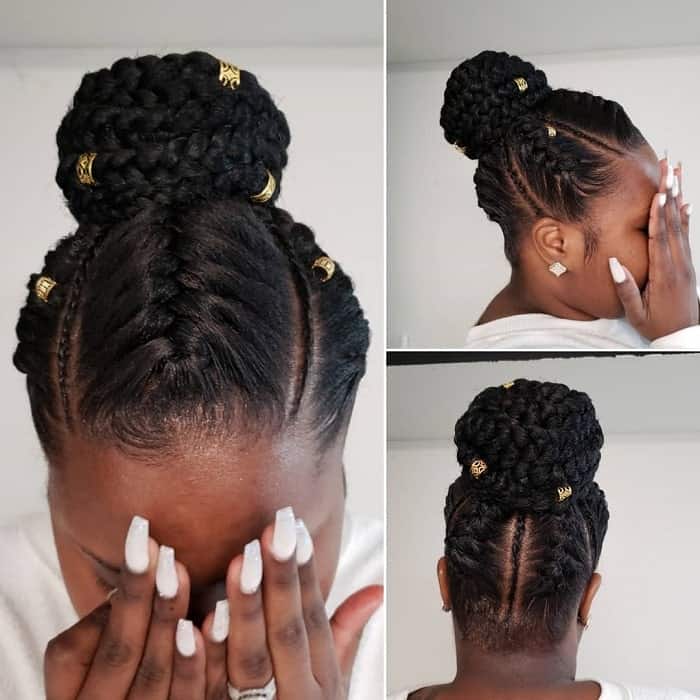
This top knot turns Fulani braids into a bold, statement updo. It is a protective style with built-in detail, especially with cuffs or beads.
How to style: Cornrow the hair toward the center crown. Add gold cuffs or beads as you braid if you want accessories. Wrap the loose ends into a tight top knot.
Who should try it: Anyone who wants a protective style with cultural flair.
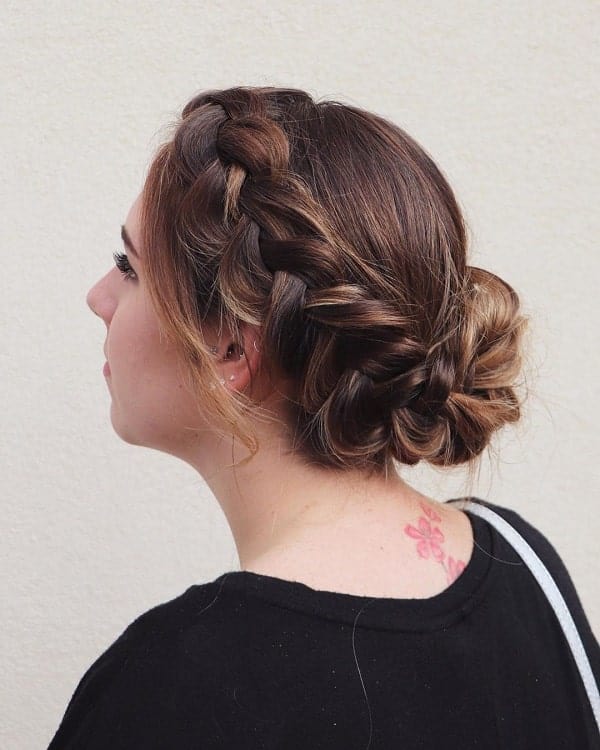
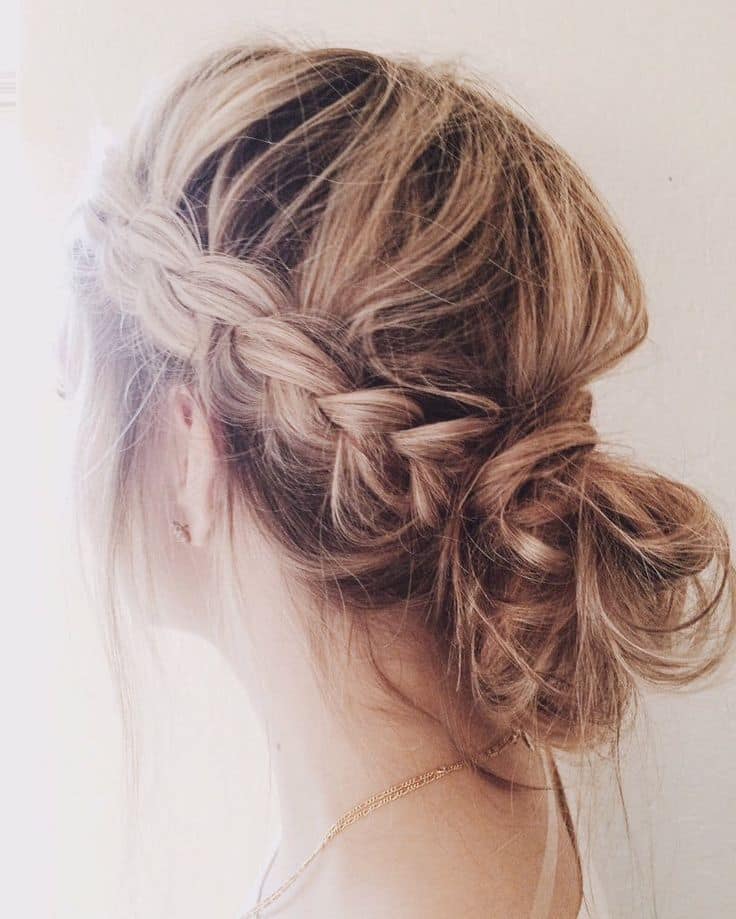
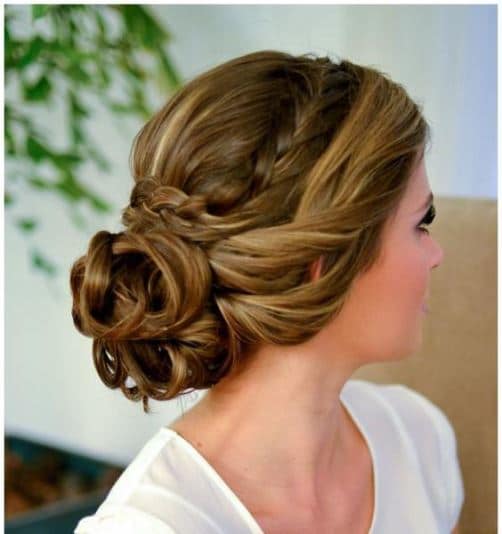
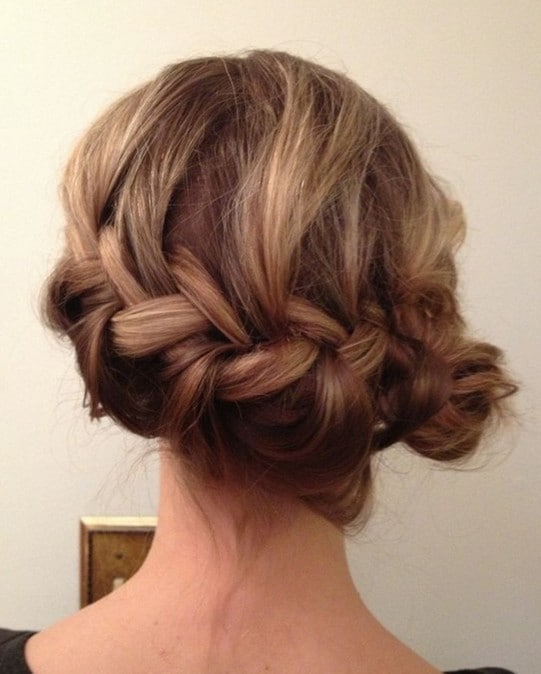
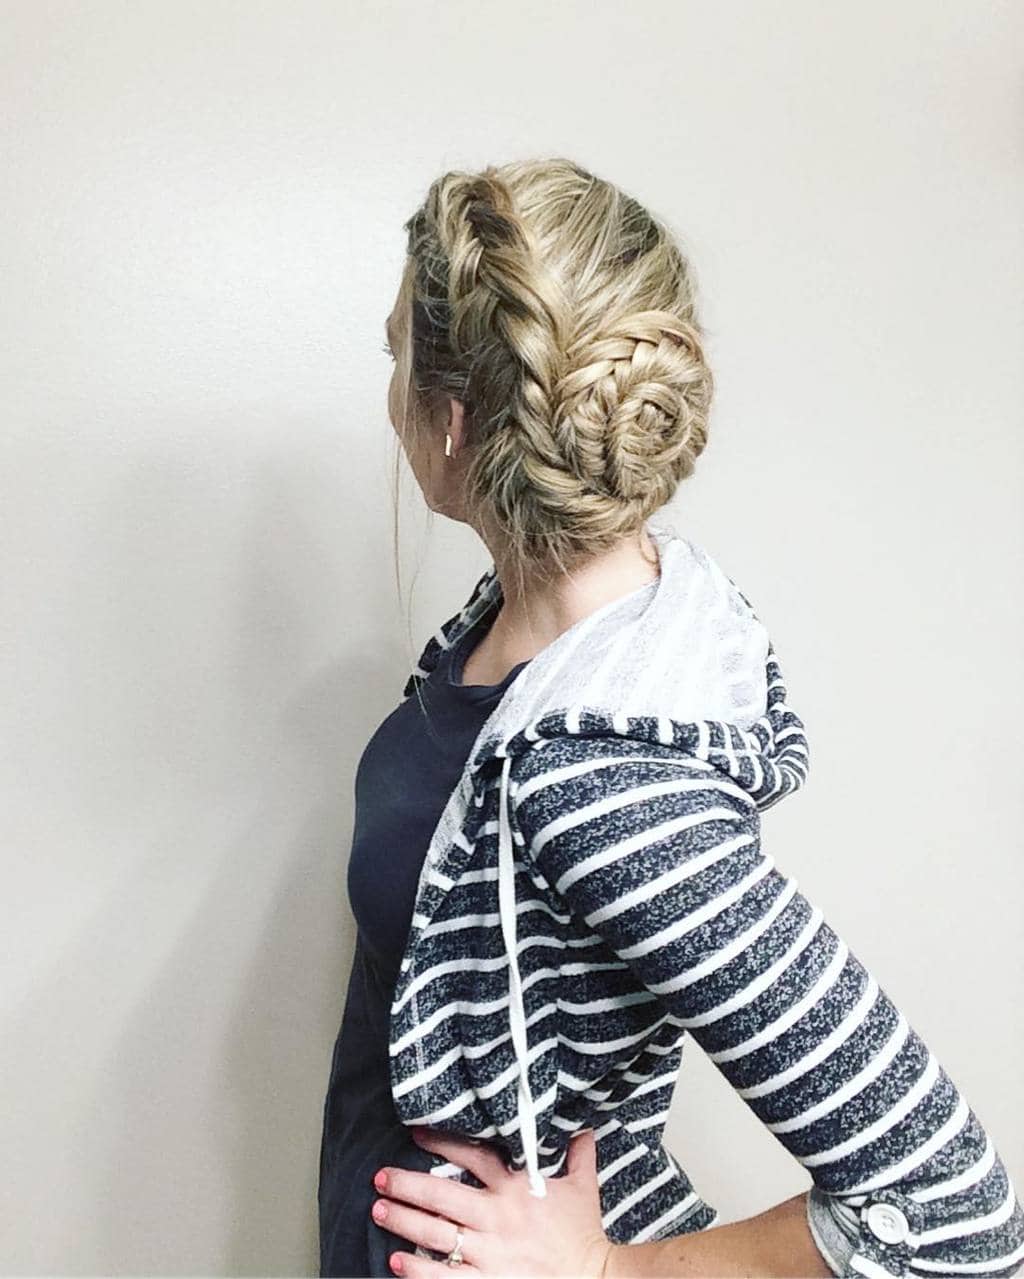
6. Asymmetrical Side-Swept Bun
A side-swept braided bun sits low and romantic. The diagonal braid gives the look movement without feeling fussy.
How to style: Create a deep side part. Braid diagonally across the back of the head toward the opposite ear. Coil the ends into a soft low side bun near the nape.
Who should try it: Square faces. The side sweep softens the jawline.
7. Classic Straight-Back Cornrows Bun
Straight-back cornrows that finish in a low bun look sporty and polished. This is a practical choice for work, the gym, and busy weeks.
How to style: Section hair into 6 to 8 vertical rows. Cornrow straight back from the hairline to the nape. Gather the ends and wrap them into a low bun.
Who should try it: Anyone who wants low maintenance hair for an active routine.
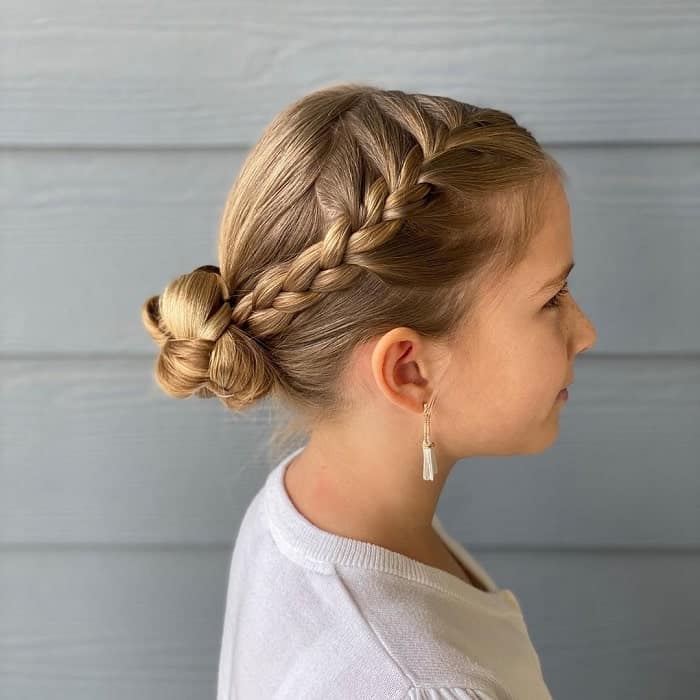
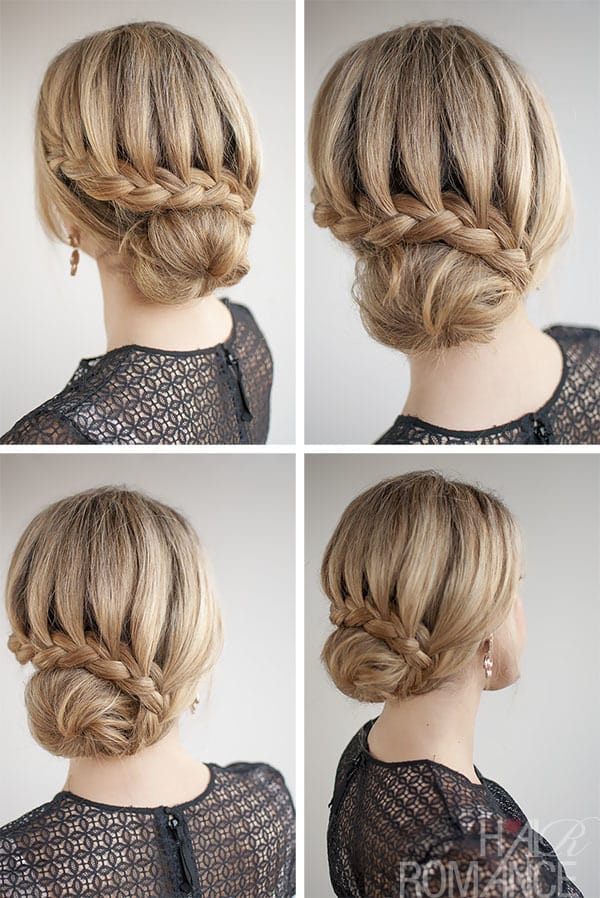
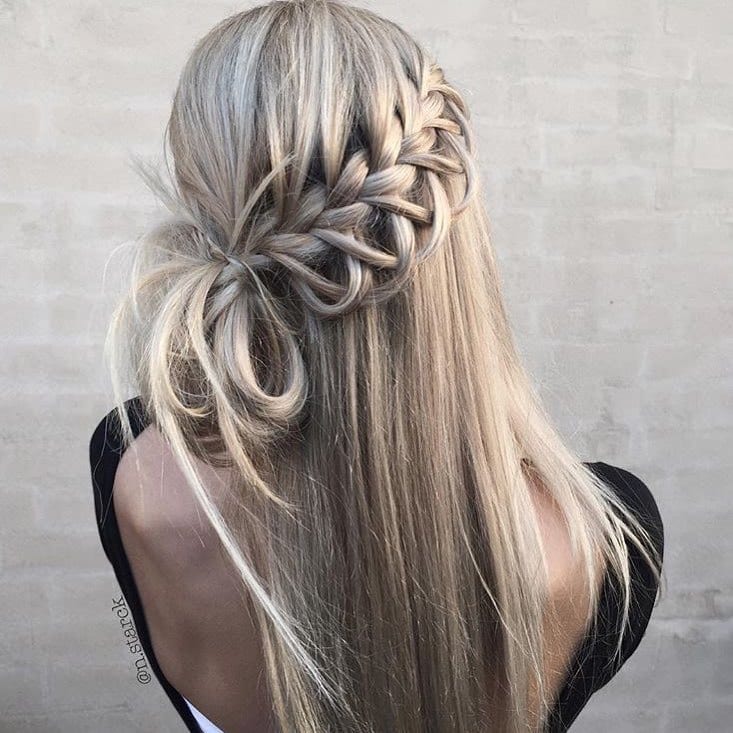
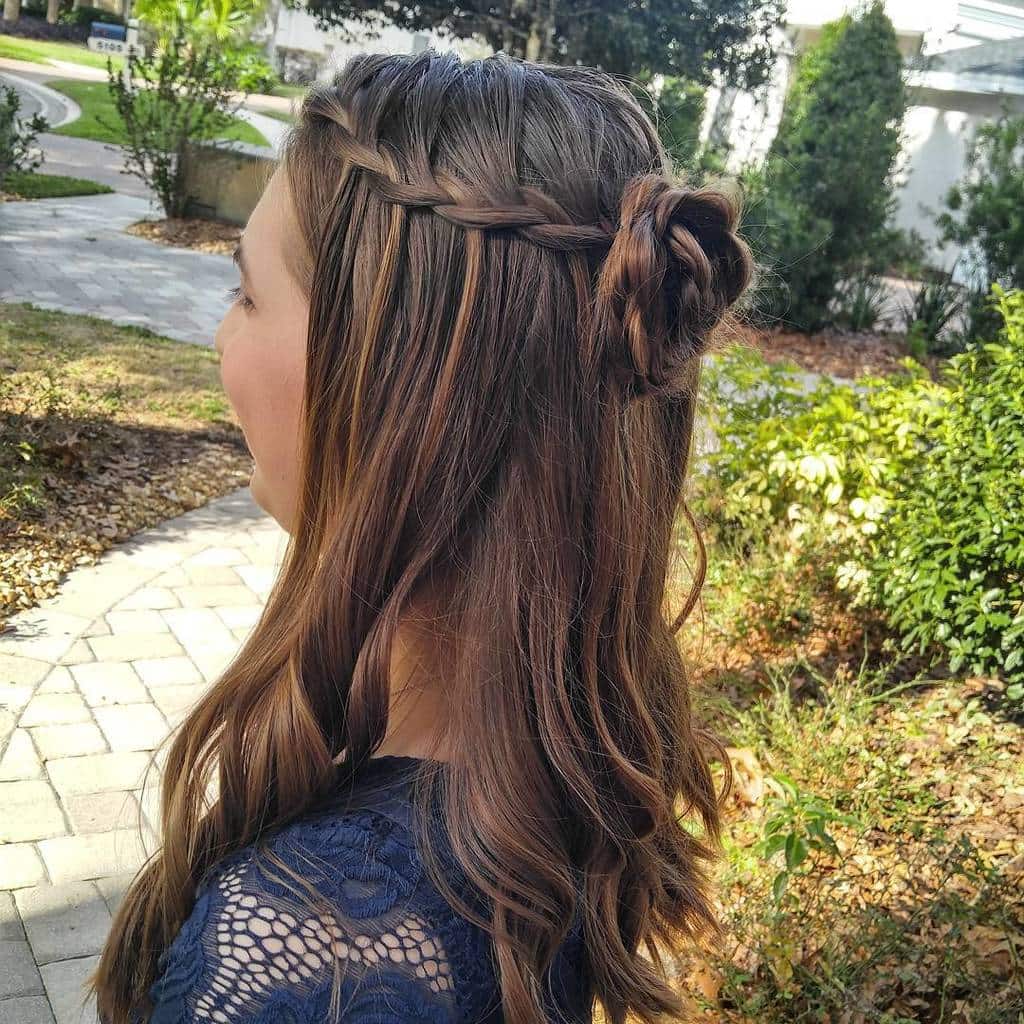
8. Side Dutch Braid to Low Bun
A side Dutch braid into a low bun adds width and softness around the hairline. It is a pretty option for dressy events and wedding season.
How to style: Create a deep side part. Dutch braid along the hairline. Gently pull the braid edges for volume before pinning the ends into a low bun.
Who should try it: Long and oblong faces. This adds width.
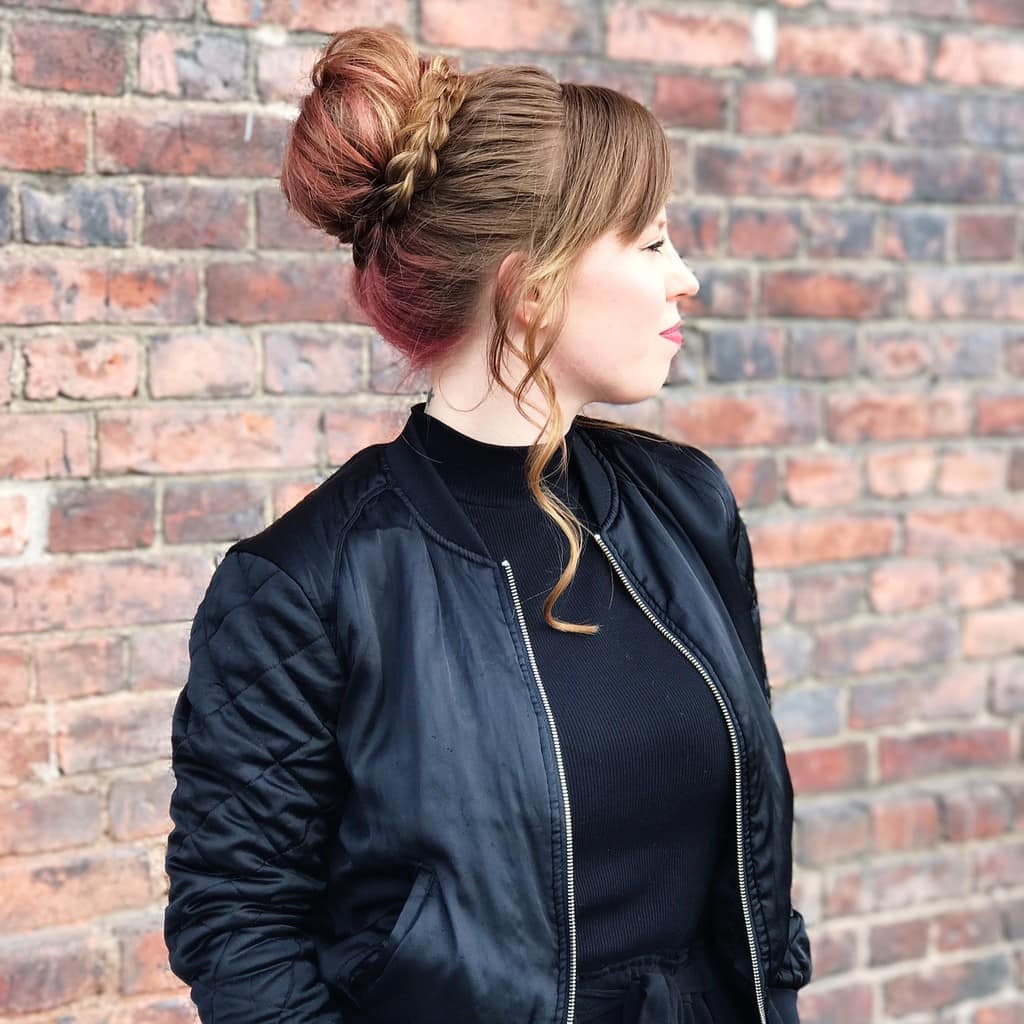
9. Sleek High Bun with Braided Extension
This sleek high bun uses a braided extension for instant structure and length. It is a fast way to get a glam finish, even on shorter hair.
How to style: Apply strong-hold gel and brush hair into a sleek high ponytail. Attach a braided hairpiece or extension. Wrap it around the base and pin it securely.
Who should try it: All hair types, including short hair that cannot form a full bun on its own.
10. Double Dutch Pigtail Buns
Two Dutch braids twisted into low buns look sweet and secure. It is perfect for kids and it also works for playful adult days.
How to style: Part hair down the center. Dutch braid both sides to the nape. Secure with snag-free elastics, then twist and pin the ends into two low buns.
Who should try it: Kids, or adults who want a playful look.
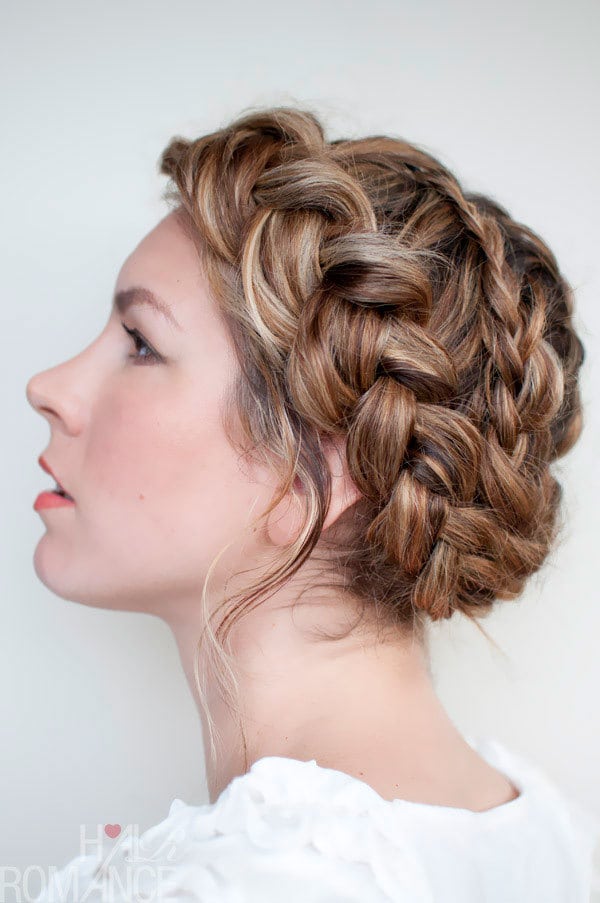
11. Halo Braid (Milkmaid Braid)
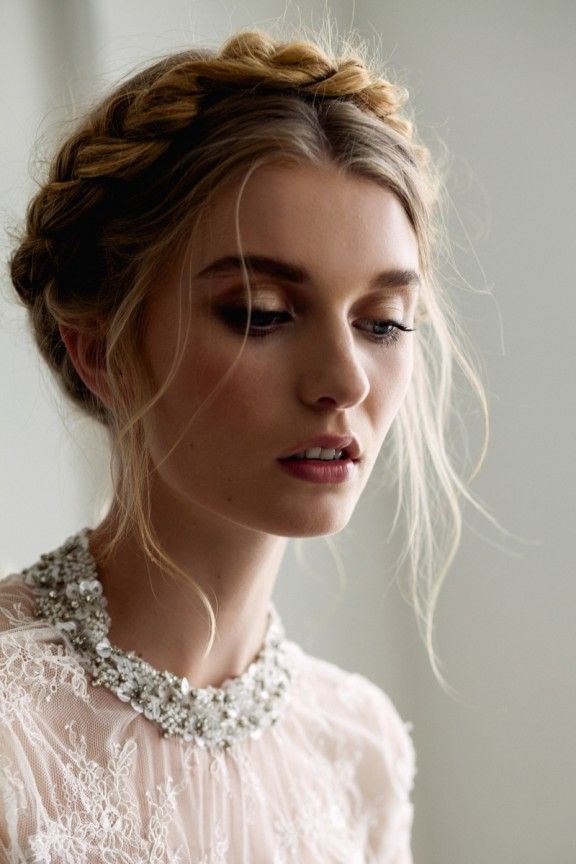
A halo braid wraps around the head like a crown. It keeps hair off your neck and photographs beautifully.
How to style: Create two pigtail braids. Lift them up and cross them over the top of the head. Pin behind the ears and at the back so the ends stay hidden.
Who should try it: Oval faces.
12. Snake Braid Updo
This snake braid pattern makes the braid the main design. It is for days when you want your updo to look like art.
How to style: Section the hair in a zig-zag pattern across the scalp. Braid continuously, following the part so the braid “snakes” across the head.
Who should try it: Anyone who wants an artistic statement style.
13. Boho Braided Top Knot

A messy top knot with a small braid detail feels relaxed and beachy. It suits wavy or curly hair and works for casual plans.
How to style: Pull hair into a loose high ponytail. Braid a small section of the ponytail. Twist the rest into a messy bun, letting the braid peek through.
Who should try it: Wavy and curly textures.
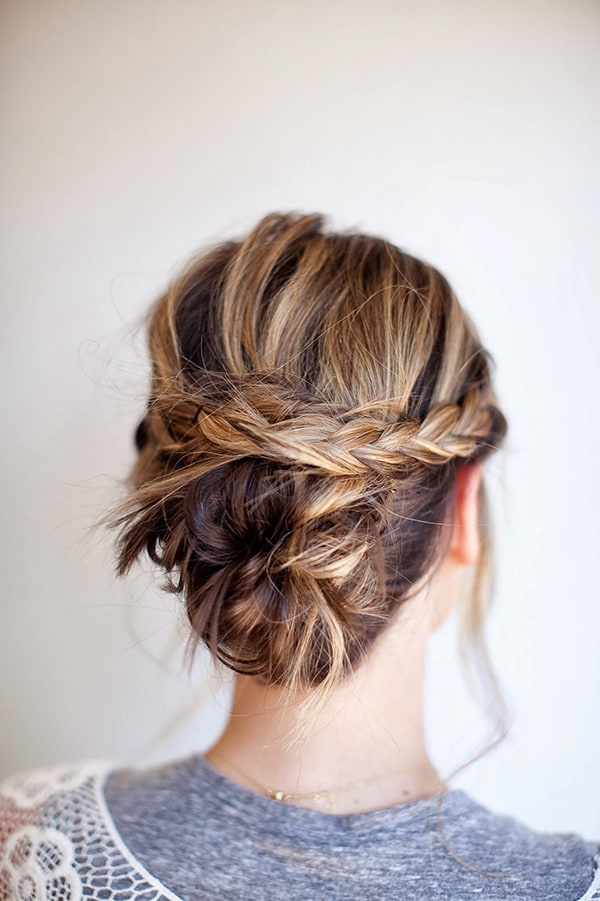
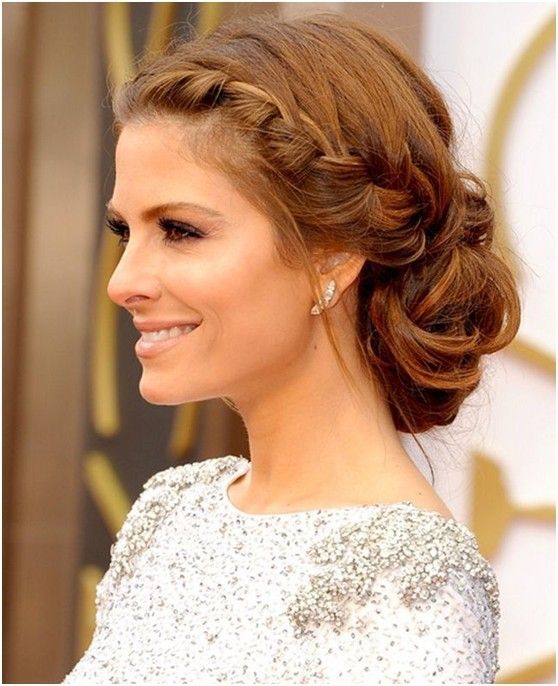
14. Nape Chignon with Accent Braids
Two small accent braids make a simple low chignon feel styled. It is an easy way to upgrade an everyday bun.
How to style: Braid two small sections at the temples. Pull everything back into a low bun at the nape and incorporate those braids into the bun.
Who should try it: Anyone who wants to dress up a simple low bun.
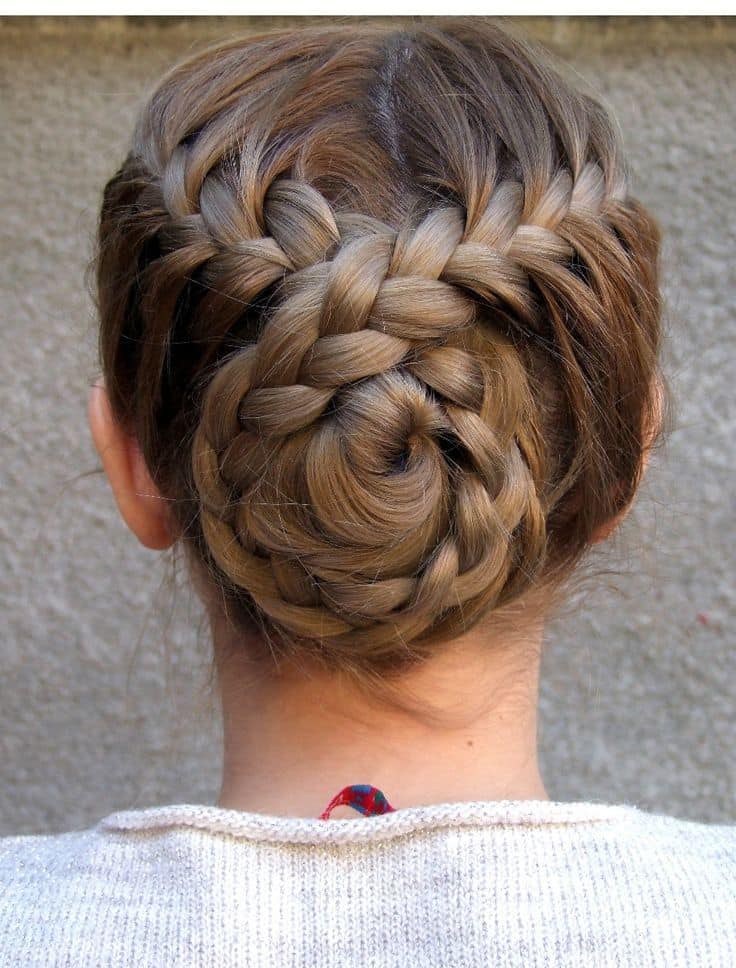
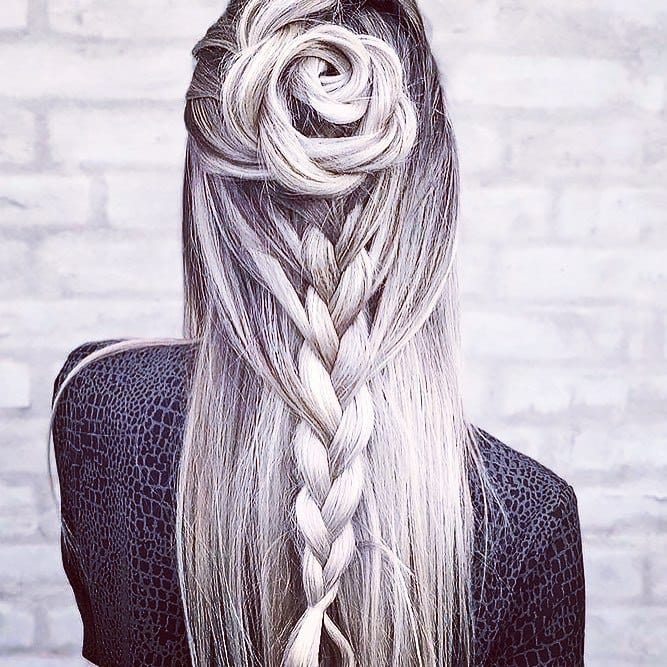
15. Lace Braid Spiral Bun
A lace braid that spirals into a bun gives a soft, romantic finish. The braid detail stands out best on longer hair.
How to style: Start a French braid, but only add hair from one side (the hairline side). Once you reach the back, spiral the braid around itself and pin it into a bun.
Who should try it: Long hair.
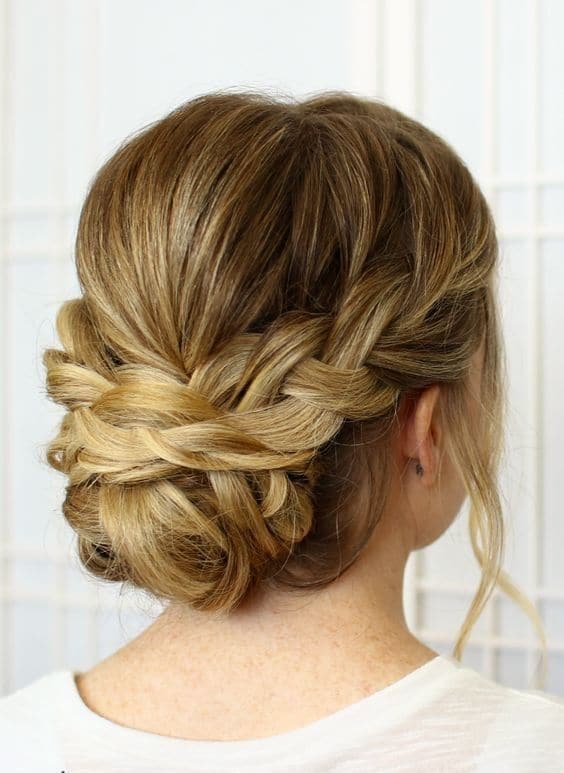
16. Split-Braid Wrapped Bun
This wrapped braid bun looks fuller when you build it over a donut. It is great when you want a tidy, performance-ready updo.
How to style: Create a high ponytail. Braid the ponytail, then wrap the braid around a donut sponge (or wrap it around the base if you are skipping the donut). Pin and tuck the ends.
Who should try it: Thin hair, especially if you use a donut for extra volume.
17. Double French Braids into High Bun
Two French braids running up to a high bun give a strong, sporty shape. It stays put when you move.
How to style: Part hair down the center. French braid both sides up toward the crown. Join the ends into one ponytail and wrap it into a high bun.
Who should try it: Anyone who likes sporty, secure updos.
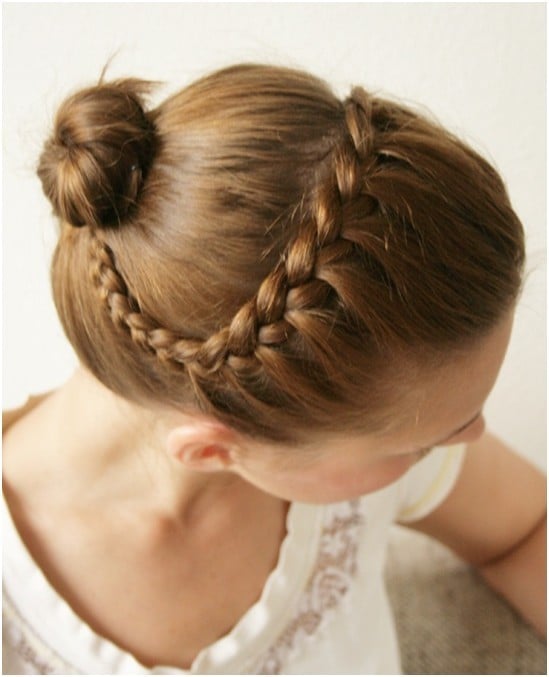
18. Side-Swept Headband Braid
This headband braid keeps the front neat while the bun stays low and easy. It is ideal when you are growing out bangs.
How to style: Braid the front section from ear to ear like a headband. Pin it behind the ear. Gather the rest of the hair into a side bun.
Who should try it: Anyone growing out bangs.
19. Reverse French Braid Top Knot
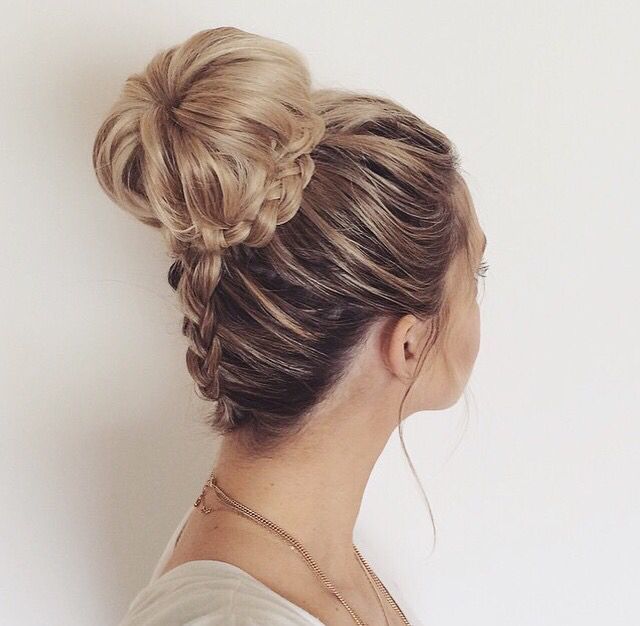
An upside-down French braid gives a cool detail at the nape. It is a smart workout bun that still looks styled.
How to style: Flip your head upside down. French braid from the nape up to the crown. Secure with an elastic, then wrap the ends into a messy top knot.
Who should try it: Gym-goers who want hair off the neck.
20. Classic French Braid Updo
A single French braid tucked under reads polished and professional. It is a reliable choice for interviews and office days.
How to style: French braid straight down the back. Roll the tail under itself at the nape and pin it so the ends are hidden.
Who should try it: Anyone who wants a polished, work-ready updo.
21. Half-Up French Braid Top Knot
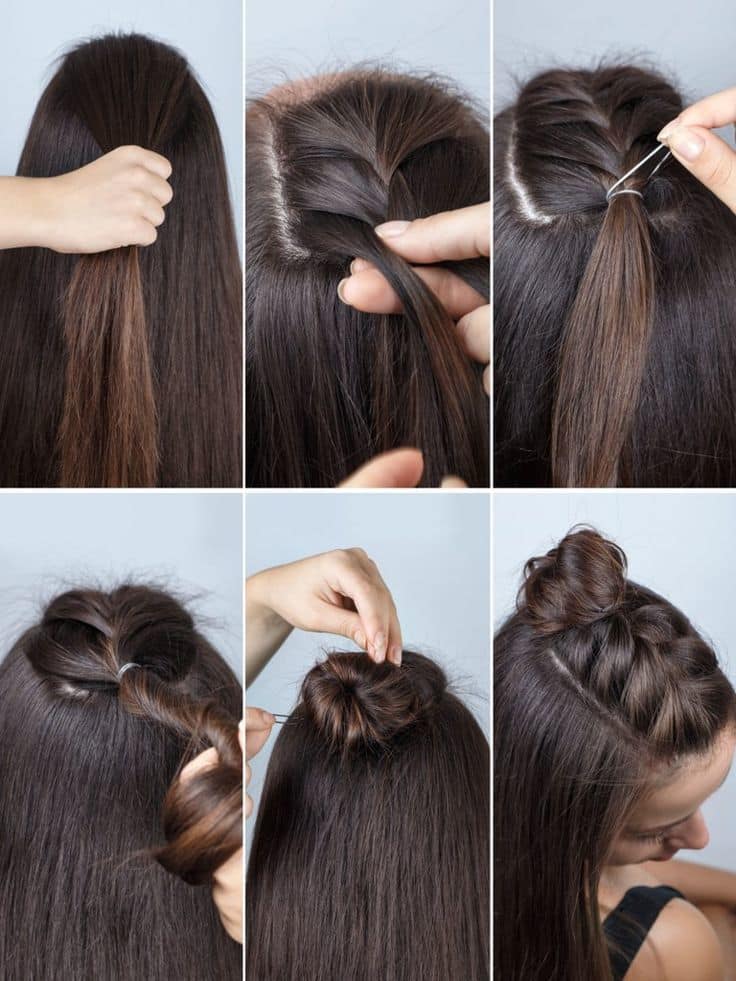
This half-up braid and top knot keeps the crown neat while the length stays loose. It works especially well on bobs and lobs.
How to style: Section the top half of your hair. French braid it back to the crown, then twist the ends into a small bun. Leave the bottom half down.
Who should try it: Bob and lob lengths.
22. High Bun with Lace Braid Crown
A lace braid wrapped around a high bun hides the hair tie and adds detail. It is simple to do but looks very finished.
How to style: Create a high bun first. Leave one section out, braid it, then wrap the braid around the base to cover the hair tie. Pin and tuck the ends.
Who should try it: Long hair.
23. Criss-Cross Dutch Braid Bun
Criss-cross Dutch braids create an X pattern before they meet in a bun. It is a bold look that holds best on thick hair.
How to style: Divide hair into four quadrants. Braid diagonally from top-left to bottom-right, then top-right to bottom-left, so the braids cross in an X. Combine the ends and pin them into a bun.
Who should try it: Thick hair. It holds the structure best.
24. S-Pattern Cornrow Updo
An S-shaped cornrow adds movement and design to a bun updo. This is best saved for a stylist day, especially on natural hair.
How to style: Create a curved part shaped like an “S.” Cornrow close to the scalp, following the curve, then direct the ends into an updo.
Who should try it: Natural hair.
25. Loose Plait Low Bun

A loose braid rolled into a low bun feels soft and undone. It pairs well with garden-party outfits and relaxed events.
How to style: Create a very loose low braid. Roll the braid into a soft bun at the nape and pin it loosely. Pull out a few face-framing pieces.
Who should try it: Anyone who loves a boho finish.
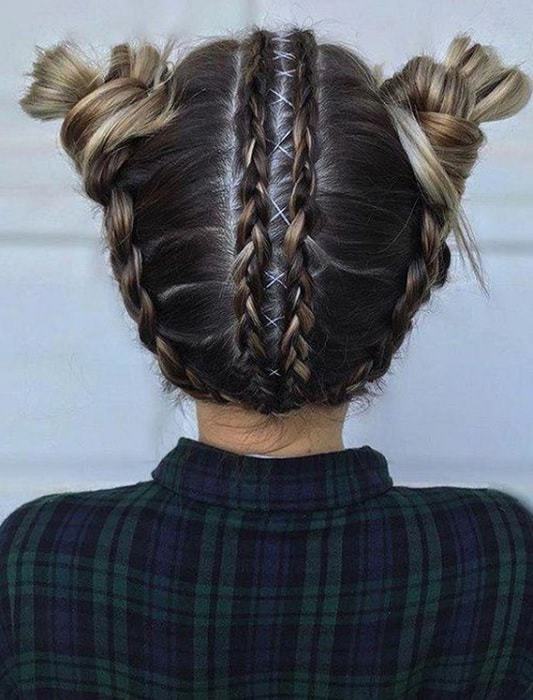
26. Half-Up Space Buns
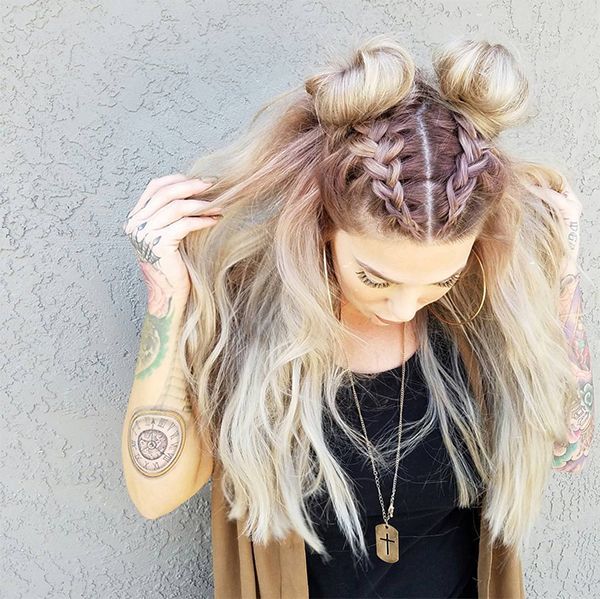
Half-up space buns keep hair off your face while the rest stays down. The braided sections make the buns look fuller.
How to style: Part the top half of hair down the center. Braid each side back, then twist each section into a small bun on top. Leave the bottom half loose.
Who should try it: Youthful styles, including teens.
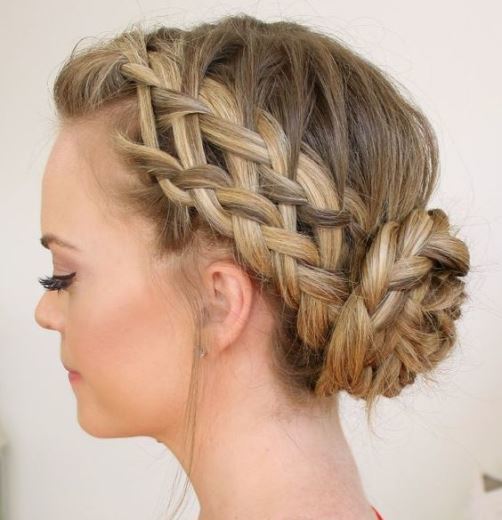
27. Retro Side-Swept Dutch Bun
A side-swept braid coiled into a bun gives a vintage finish. It is a strong choice for theme parties and formal looks.
How to style: Create a deep side part and smooth hair to one side. Braid the length, then coil it flat into a bun behind one ear. Pin it in place.
Who should try it: Oval faces.
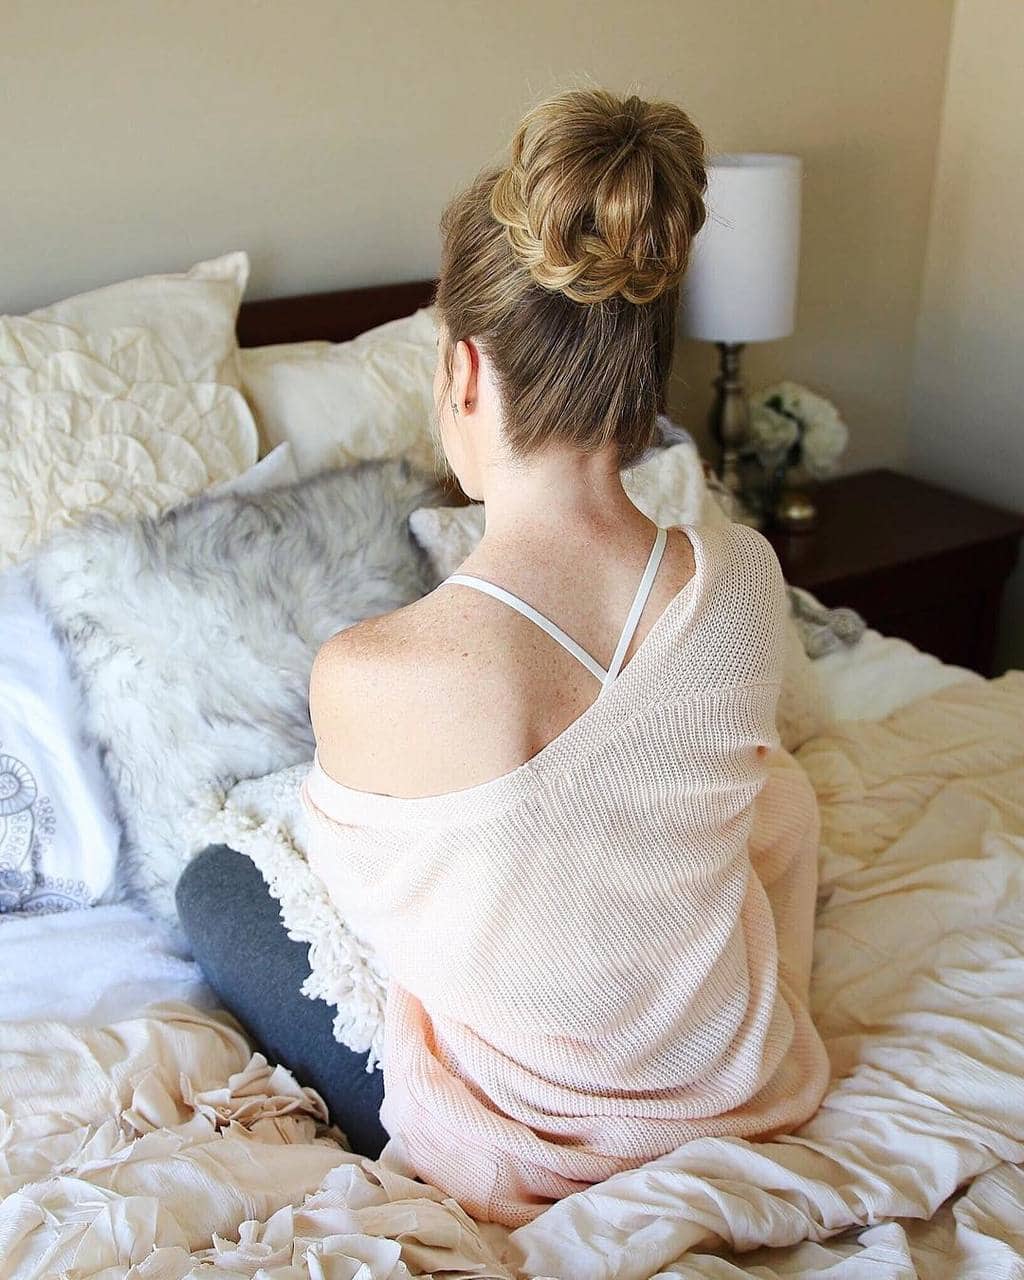
28. Clean High Braided Donut
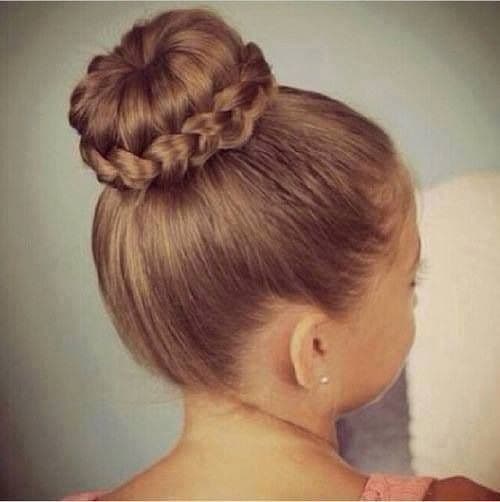
A high braided donut bun is clean and classic. The donut adds instant volume and height without teasing.
How to style: Use a hair donut (or a sock bun). Pull the ponytail through the donut, then braid the hair that covers it and tuck the ends under. Pin to secure.
Who should try it: Fine hair. The donut builds volume fast.
29. Spiky Y2K Braided Bun
This braided bun keeps the base neat but leaves spiky ends for attitude. It is made for party nights and streetwear looks.
How to style: Create a high braided bun, but leave the last 2 to 3 inches of hair out. Flat iron those ends straight, then use hairspray so they spike out.
Who should try it: Trend-focused styles.
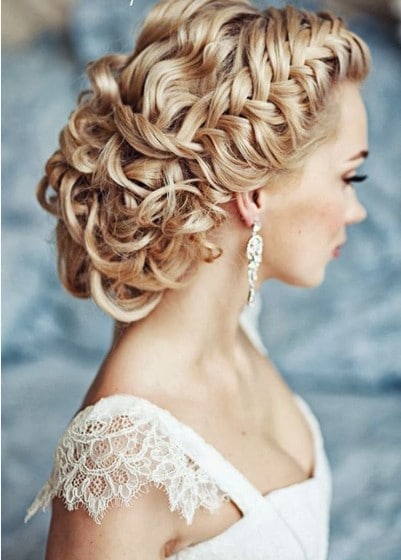
30. Jumbo Halo Braid
A jumbo halo braid creates a dramatic crown effect. It is bridal-friendly and is usually built with extensions for thickness.
How to style: This style is typically built with extensions. Feed in jumbo hair and create a thick Dutch braid that wraps around the head like a crown.
Who should try it: Anyone who wants a statement crown braid.
31. 4-Strand Cornrow Puffs
Four cornrows that finish in puffs give shape and lift. It is a cute protective look for casual days.
How to style: Part hair into four sections. Cornrow each section toward the back. Leave the ends out and shape them into two fluffy puffs.
Who should try it: Type 4 natural hair.
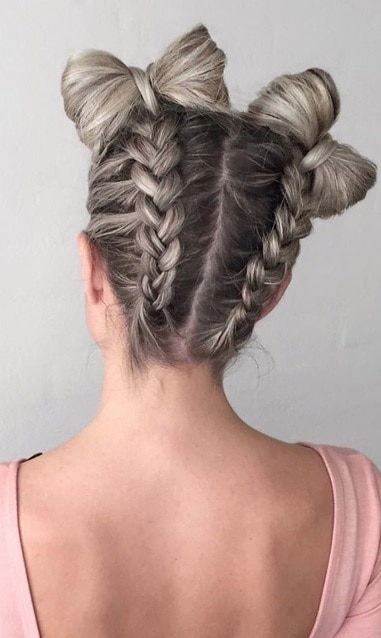
32. Double French Braid Top Knots
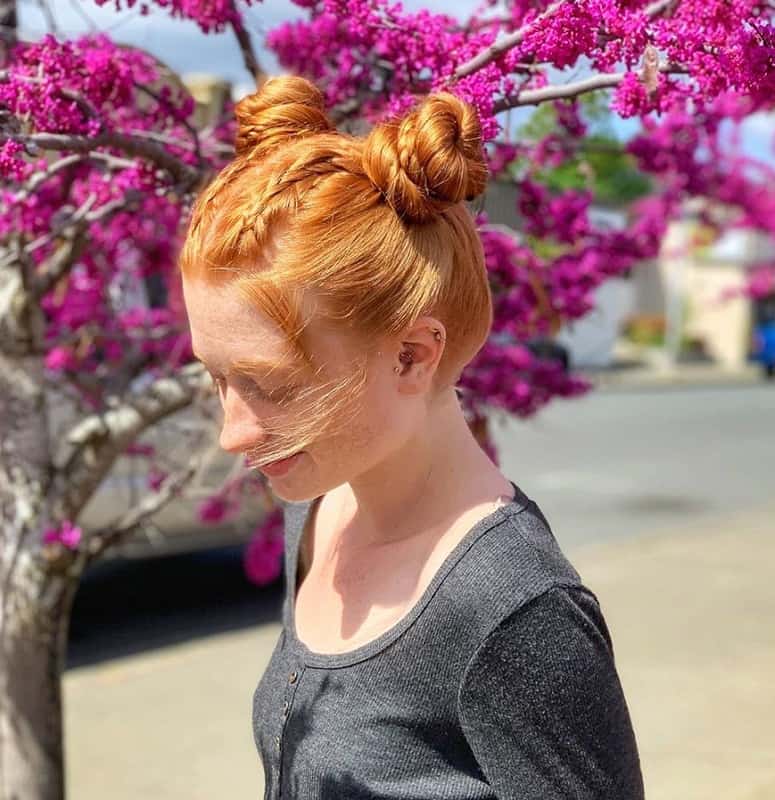
Two French braids ending in top knots show off color dimension. It is a clean weekend style that stays secure.
How to style: Part hair down the center. French braid from the forehead to the crown on both sides. Twist the ends into two tight top knots.
Who should try it: Anyone with colored hair who wants to show dimension through the braid pattern.
33. Half-Up Braided Space Buns (Short Hair)
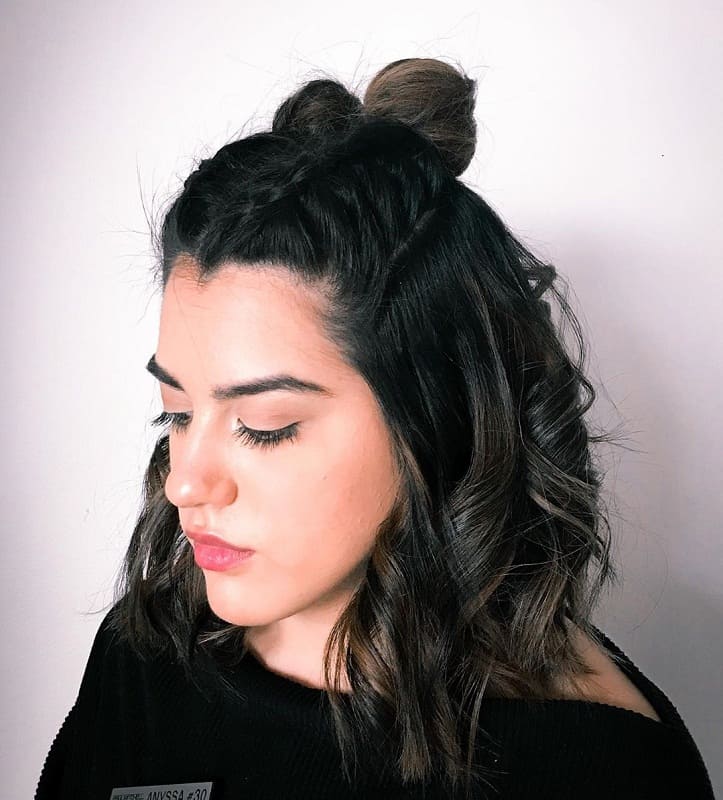
Half-up braided buns give short hair a fun twist without needing extra length. The loose waves keep it soft and wearable.
How to style: Section only the crown area. Split it into two, braid each side, then twist into two small buns. Use a flat iron to add soft waves to the loose hair.
Who should try it: Bobs and short haircuts.
34. Double Reverse French Braid Buns
Double reverse braids lead into buns at the top for a gym-ready look. It takes more effort to braid and pin behind your head.
How to style: Flip your head forward, part the back down the center, then French braid up the back of the head in two sections. Secure each braid at the top and wrap into buns.
Who should try it: Anyone comfortable styling behind the head. This is hard to reach on your own.
35. Braided Bow Bun
A bow bun turns a top knot into a statement shape. It is playful and photo-ready, but it takes precision to pin.
How to style: Create a high bun, but do not pull the hair all the way through, so you form a loop. Split that loop in half. Pull the tail over the center to create the bow “knot,” then pin everything in place.
Who should try it: Anyone who loves a cute, girly finish.
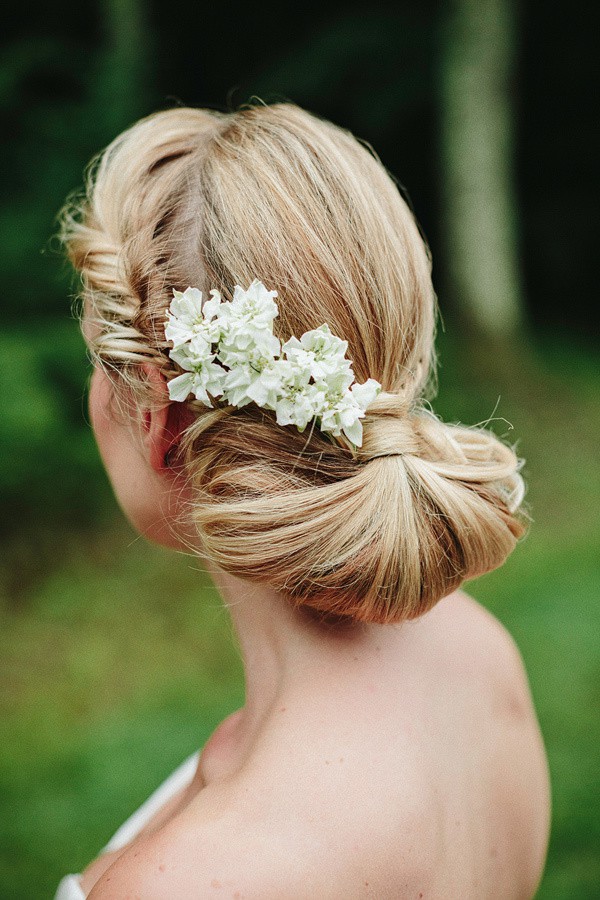
36. Fishtail Braid Low Bun
A fishtail braid rolled into a low bun looks detailed without feeling heavy. It suits long hair, especially if you have highlights.
How to style: Create a low ponytail. Split it into two sections. Take small strands from the outside of one section and cross them to the other, repeating to form a fishtail braid. Roll it into a bun and pin.
Who should try it: Long hair, especially highlighted hair that shows the braid detail.
37. Rope Twist High Bun
A rope twist bun is sleek and quick with a smooth finish. It is an easy upgrade from a basic top knot.
How to style: Make a high ponytail and split it in two. Twist both sections clockwise, then wrap them around each other counter-clockwise. Coil into a bun and pin.
Who should try it: Thick hair.
38. Braided Faux Hawk
Small braided buns down the center create a faux hawk line. It is edgy and works well for concerts.
How to style: Section hair into three vertical ponytails down the center. Braid each ponytail and wrap each one into a small bun, placing them close together to form a mohawk ridge.
Who should try it: Anyone who likes an edgy finish.
39. Scarf-Braided Bun
A scarf braided into the plait adds a styled, vacation feel. It is a simple way to dress up a bun without changing the technique.
How to style: Tie a scarf to your hair tie at the base of a ponytail. Treat the scarf as the third strand as you braid. Wrap the braid into a bun and pin.
Who should try it: Anyone who wants an easy accessory moment.
40. Micro-Braid Bun
Micro braids gathered into a bun create big volume with a protective finish. It is designed for long-term wear and low daily styling.
How to style: Braid the full head into micro-braids, then gather all braids into a high bun and secure.
Who should try it: Anyone looking for a protective style that can last.
41. Pull-Through Braid Bun
A pull-through braid gives a full, braided look using elastics. It is great when you want volume without advanced braiding skills.
How to style: Create a series of ponytails with elastics. Split and loop each ponytail through the next to build the “pull-through” effect. Wrap the end into a bun and pin.
Who should try it: Thin hair. This technique builds visible volume.
42. Basket Weave Bun
This basket weave bun has an intricate, woven finish. It is perfect for weddings when you want the updo to be the main feature.
How to style: Weave multiple small ponytails or sections into a basket pattern, then secure the ends into a bun.
Who should try it: Anyone who loves intricate updos.
43. Butterfly Braid Bun
A butterfly braid bun looks oversized and airy. Pulling the loops wide helps fine hair look fuller.
How to style: Create a standard braid, then pull the loops very wide to create the oversized “butterfly” effect. Wrap the braid into a bun and pin.
Who should try it: Fine hair. The pulled loops make it look fuller.
44. 5-Strand Braid Bun
A five-strand braid creates a wide, flat plait before it wraps into a bun. It looks best on thick, straight hair.
How to style: Weave five strands in an over-under pattern to create a wide, flat braid. Coil it into a low bun and pin.
Who should try it: Thick, straight hair.
45. Infinity Braid Updo
The infinity braid gives a figure-eight pattern that looks high-end. Save it for weddings or a stylist appointment.
How to style: Use the figure-8 wrapping pattern around two core sections to form the infinity braid. Once complete, secure the ends and pin into an updo.
Who should try it: Long hair.
46. Braided Banana Bun
A banana bun gives an elongated twist shape with a soft profile. The braid wrap adds structure for a work-ready finish.
How to style: Form a loose, elongated bun shape and secure it. Wrap braids across the center to hold the structure and add detail.
Who should try it: Anyone who wants a polished updo that still feels soft.
47. Bubble Braid Bun
Bubble sections make this bun look modern and sporty. It is quick, secure, and beginner friendly.
How to style: Build a ponytail and add elastics down the length to form “bubbles.” Twist the bubble pony into a bun and pin it in place.
Who should try it: Anyone who wants a sporty, modern bun.
Braided bun hairstyles don’t take hours, but if you feel like experimenting, many of the styles are beautifully intricate. How do you combine braids and buns when you do your hair?